
Taking the step into kegging your beer can save lots of time both on packaging day and while carbonating! In this article, I’ll walk you through how to keg a beer along as well as discuss other facts regarding Cornelius kegs!
Why Switch to Kegging?
Kegging your homebrew vs bottling/canning saves a great deal of time and effort!
For myself, one of my least favorite parts of the brewing process is standing at the sink cleaning and sanitizing 10-50 bottles at a time. Say goodbye to this while kegging!
When kegging, you simply need to make sure your keg and siphon and clean and sanitized, and just transfer your beer from fermentor to the keg.
You can also save time while carbonating. When bottle conditioning, it takes a solid two weeks letting the bottles sit at room temperature for the beer to naturally carbonate. When kegging, you can burst carbonate, which will be discussed in more detail later, and you can have the beer carbonated within just a couple days!
You can even get more aggressive with it, and use a spunding valve to start the carbonation process while the beer ferments.
Another advantage over bottle conditioning is that when serving the beer (either from the tap or from a bottle that you bottled from the keg), you do not have to worry about avoiding a yeast sediment layer like you do when serving from a bottle conditioned bottle. If you are interested in how to bottle from a keg, please click here.
Supplies Needed for Kegging
When kegging a beer you will need the following supplies:
- Cornelius (Corny) Keg
- Siphon
- Sanitizer (I prefer Star-San)
- Keg Cleaning Solution (I prefer PBW)
- CO2 Cylinder
- Fridge/Kegerator/Keezer
I have a whole article dedicated to the art of cleaning homebrew kegs, please click here to learn more!
Two Types of Kegs
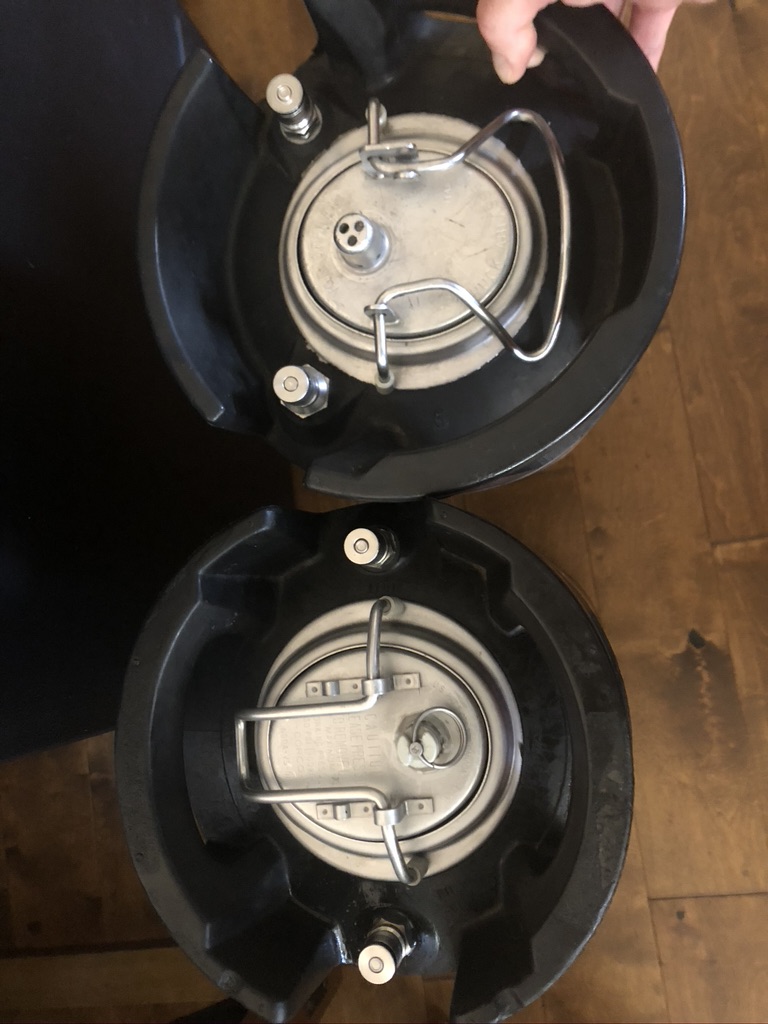
There are two types of homebrew kegs that exist: ball lock and pin lock. The difference refers to the way that the gas and liquid line connectors attach to the keg posts/terminals.
Ball lock kegs are the preferred type by most homebrewers and are far easier to find supplies for. However, there are inexpensive conversion kits, like this one, that can turn your pinlock keg into a ball lock very easily!
The terminal spacing and lids are generally different on the pinlock and ball lock kegs. Below, you can see the spacing differences. I have converted the pinlock keg to ball lock terminals.
I highly recommended trying to find used kegs on Craigslist, Facebook Marketplace, or similar used marketplace as buying new kegs can get expensive. If you do purchase a keg used, make sure that you clean it well and replace all o-rings with a kit such as this one.
How to Keg a Beer
The first step before diving into kegging your beer is to make sure everything is cleaned and sanitized. For a full run down on this process, please see my article here.
It can be helpful to perform a ‘cold-crash’ prior to kegging. A cold crash simply means decreasing the temperature of your fermentor to just about freezing levels. This helps solidify the yeast cake at the bottom of the fermentor and aids in clarity.
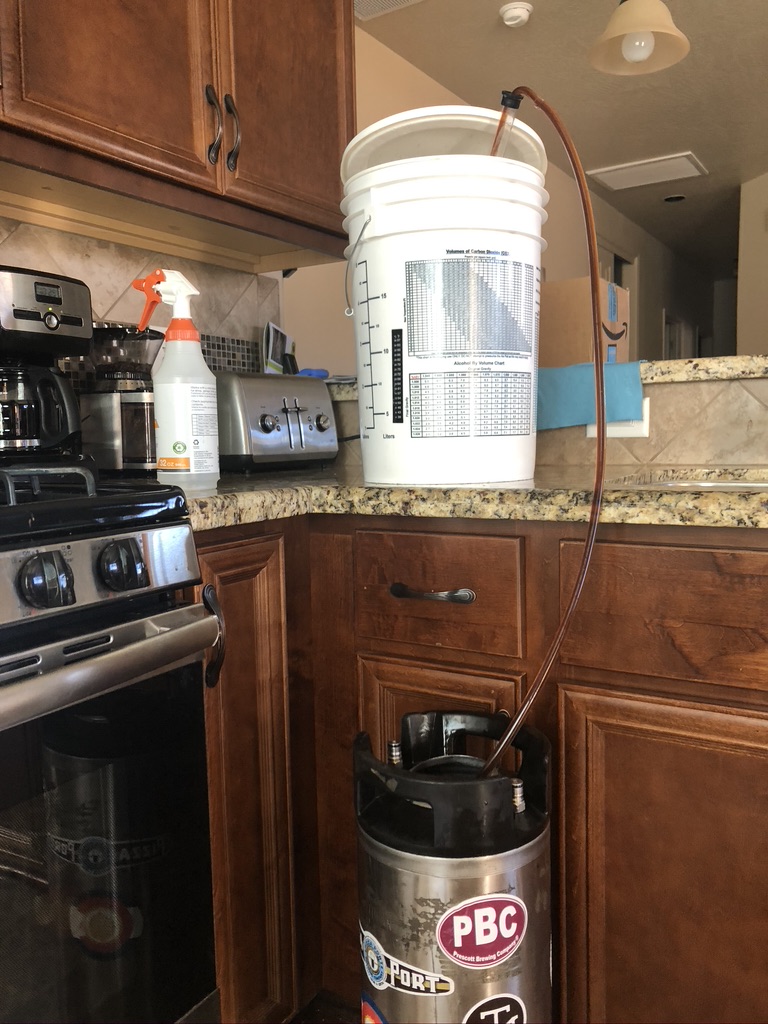
Once your keg and siphon are sufficiently cleaned and sanitized, open your fermenter and place your siphon in. Make sure to keep the other end of the siphoning hose in your sanitized keg. I like to keep CO2 in the keg prior to kegging. To be honest, I’m not sure how much of a difference it makes as you have to open the lid to siphon the beer in, but it makes me feel like I’m reducing the chance of oxidation as much as possible.
Your fermentor full of beer should be higher than the keg to make sure that siphoning is quick and easy. I like to place my fermentor on the kitchen counter and siphon into the keg on the kitchen floor.
You will have to tip your fermentor slightly to get the most beer into the keg that you can. Try to do this slowly as to not disturb the yeast cake at the bottom. However, the yeast will settle into the bottom of the keg as it cools and you will be able to extract this later.
Once you have transferred the entirety of the beer to the keg, put the lid on and move to your keg to your fridge/kegerator/keezer.
Carbonation
I plan on writing a full blown detailed article on carbonation methods, but until then, let’s discuss the basics below.
Using carbon dioxide from a cylinder to carbonate your beer is referred to as ‘force-carbonation’. This differs from using additional sugar placed in a close container (bottle) to carbonate your beer.
With force carbonation, it is much easier and quicker to fine-tune your carbonation level.
There are two main methods to force carbonate, differing in how quickly you need/want the beer carbonated.
In the first method, you simply set your keg pressure to 20 PSI and let it sit. It should take 7-14 days for it to carbonate in this manner. Once the beer is sufficiently carbonated, turn the pressure down to serving pressure and bleed off excess CO2.
Some brewers prefer to switch the gas and liquid terminals during the force carbonation time so that the gas flows down through the dip tube. This can ensure that the beer carbonates quicker. Just make sure to switch the terminals back when it comes time to serve.
In the second method, you set the pressure at 30 PSI and agitate/shake the keg. I generally shake and roll the keg on the floor while attached to the pressure for about 10 minutes. This gets lots of CO2 flowing throughout the beer quickly. Then set the pressure back to 20 PSI and let the beer sit for a couple days. Using this method generally has the beer carbonated within 2-4 days.
You can also perform a combo of natural carbonation and force carbonation by adding a small amount of priming sugar to the kegged beer. The issue with this is that the yeast is generally not very active at serving temperatures.
Versatility of Corny (Cornelius) Kegs
As you can see, packaging your finished beer in a keg vs bottles is significantly easier and less time-consuming!
However, not only can corny kegs make serving your beer easier, they can also make an excellent fermentation vessel.
As the kegs are naturally made to hold pressure while sealed, they can easily be converted to a fermentor. You can cut the dip tube in a corny keg that you want to use as a fermentor, which makes a no-oxygen transfer from fermenting keg to serving keg super easy! I will link to articles on these methods at the end of this article.
I also enjoy bottling from my keezer. The benefits of this include being able to just bottle one or two at a time for friends, and being able to serve a beer that you don’t have to worry about yeast sediment with.
Again, I will link to an article on bottling from a kegerator or keezer at the end of this point.
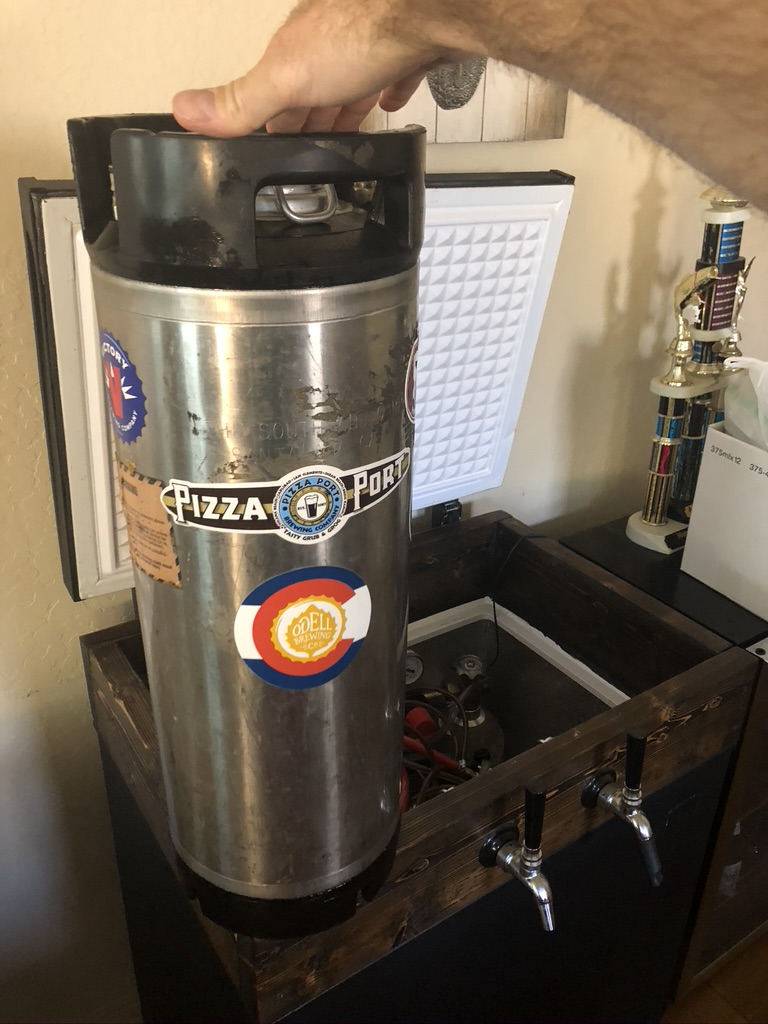
What to Store Keg In
I should mention a potential ‘elephant in the room’. A large part of this topic that was not mentioned in this article is regarding the vessel that you will store your keg in. This was not mentioned on purpose as this is a topic that whole books have been written about!
Some people simply use fridges with a ‘picnic tap’ attached to their keg, this would be the simplest method. Others prefer to purchase ready-to-go kegerators, this is definitely the most expensive option. My preferred way, which I’m currently using, is a home made keezer. A keezer is just a chest freezer built into a kegerator. Keezers range from extremely simple to extravagant! I found this to be an inexpensive option for my family, and we were able to have the finished product come out attractive enough that my wife is okay with placing it in our living room!
I plan on doing a write-up on how to build a keezer in the future, but for now, there is a great deal of good information that can be found online on this subject!
Thank you very much for stopping by!
If you enjoyed this article and are interested in more how-to posts like this one, please click here.
For quick reference of kegging posts: