Brewing cider can be one of the simplest alcoholic drinks to make! With minimal equipment and ingredients, you can make delicious cider right from your own home. In this article, I’ll walk you through how to make hard cider with apple juice!
Equipment Needed:
- 1 Gallon Fermentor (3.8L) (or Apple Juice purchased in a 1 gallon glass jar/carboy)
- Airlock with rubber stopper
- Siphon and Tubing
- Bottles to package the cider
Ingredients Needed:
- Your favorite Apple Juice (preferred to be in 1 gallon (3.8L) glass carboy)
- Brewing Yeast (will discuss yeast choice under ‘tips’ section)
Optional Equipment or Ingredients:
- Hydrometer or Refractometer
- Hops
- No-Rinse Sanitizer, like Star-San
- Pectic Enzyme
What is Hard Cider?
Hard cider is simply apple juice that has been fermented by yeast. Fruit juice contains sugar that yeast consume to make alcohol and carbon dioxide.
Hard cider can be made from either store-bought apple juice, or by pressing the juice from apples. Obviously, it is a much simpler process to produce hard cider from apple juice bought from a store. However, once you get comfortable with producing cider this way and would like to get creative, hard cider made using a press is very satisfying.
When most people hear ‘hard cider’, they generally think of Angry Orchard, Ace, or Woodchuck. These ciders are generally back-sweetened with additional sugar/apple juice. This makes them very sweet beverages, too sweet for many consumers!
It is important to keep in mind that hard cider can made to be as sweet or dry as you would like. If a yeast is able to consume most of sugar in the juice, it will taste drier.
I, personally, am not a fan of your mass produced, super sweet, hard cider. However, I absolutely love a well made cider on the drier side.
Bottom line here, if you’ve had one of these ciders and haven’t loved them, you may still find some cider you truly enjoy.
On the other hand, if you like how these backsweetened ciders taste, I’ll walk you through how to do this as well!
If you would like to learn even more about cider making, I highly recommend this book!
How to Make Hard Cider:
Step One: Obtain Ingredients and Equipment
The most important ingredient is, you named it, apple juice!
I would highly recommend getting an organic apple juice in a one gallon (3.8L) glass carboy, such as this example.
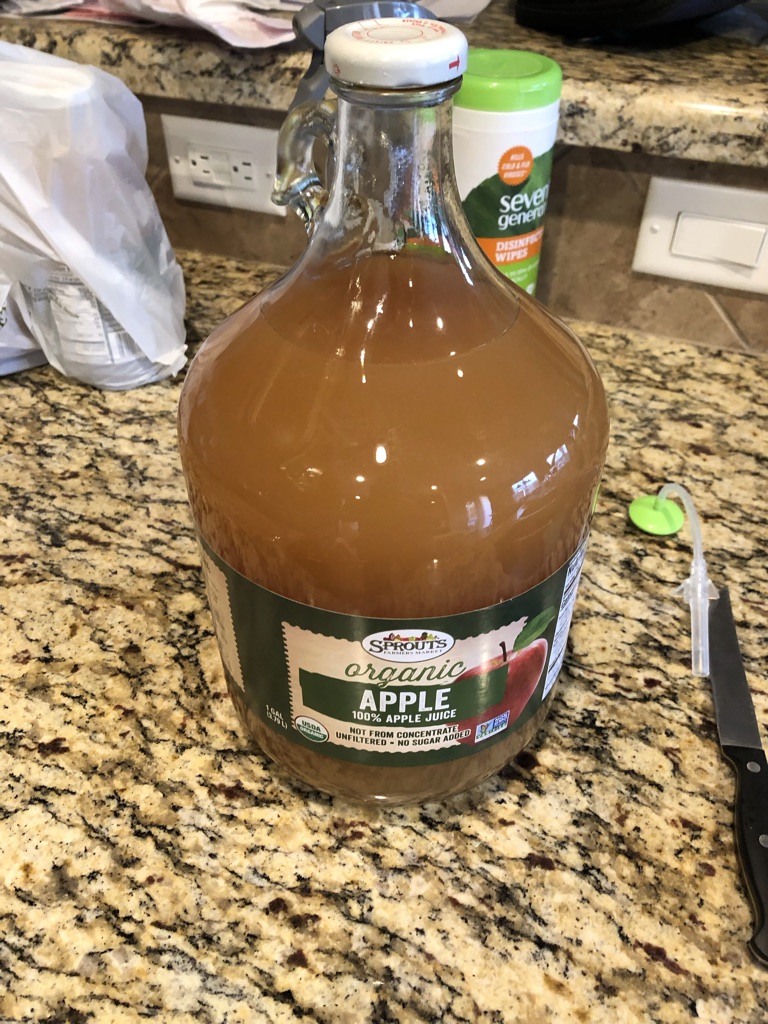
The reason for this is, the glass vessel that it comes in will function as your ‘fermentor’, and you will not have to buy this piece of equipment separately! If you are unable to find apple juice in a container like this, you can buy a separate fermentor, like this one.
You will also need a rubber stopper and airlock. An airlock is filled with sanitized water or vodka and will let carbon dioxide escape without allowing anything into your cider.
These do come in some different sizes, so it is ideal to go to your local homebrew store to obtain the correct size, or you can measure and purchase online.
Then, you just need yeast! I will go into more detail regarding yeast choice towards the end of the article. I would recommend using a yeast made for making beer, cider, wine, or champagne. A common and easy-to-use choice is a beer yeast called Safale S-04. However, most beer/cider/wine/champagne yeasts will work well.
Step Two: Get Apple Juice Ready
If you bought apple juice in a glass carboy, you can essentially skip this step. You will want to make sure that the airlock that you bought fits in the neck of your carboy.
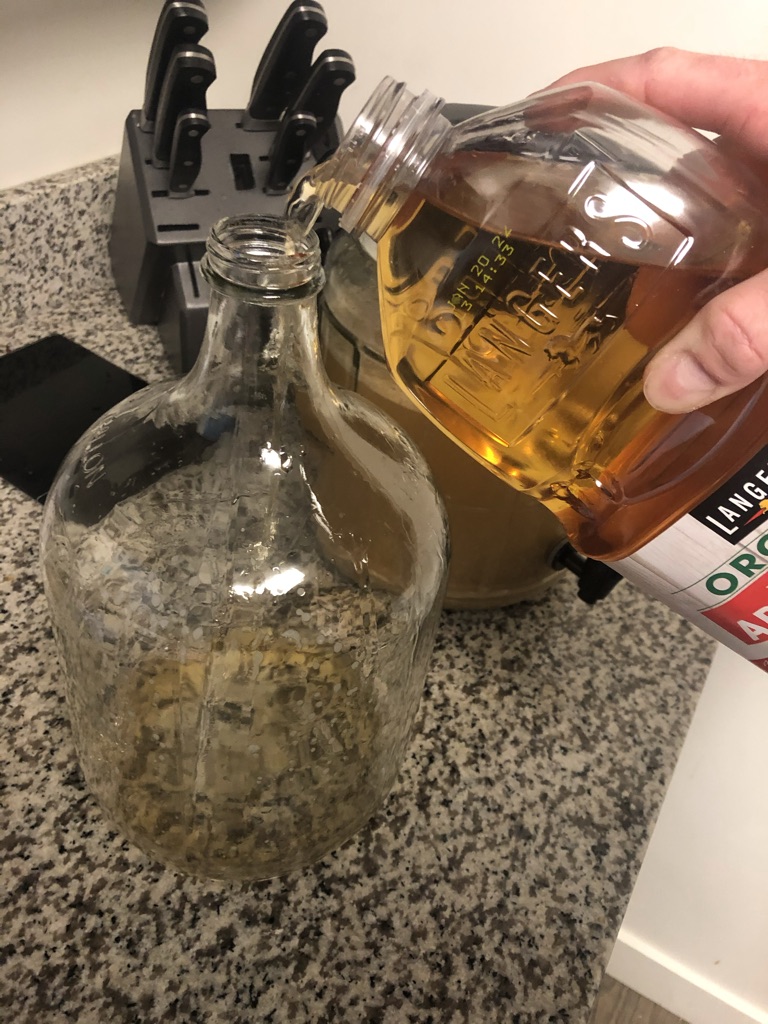
If you have a separate fermentor, you will want to clean this with soap and water and sanitize it. I prefer to use a no-rinse sanitizer, like Star-San, due to its ease of use. However, you can use a bleach-mixture as long as you rinse very well.
Once fermentor is clean and sanitized, pour your apple juice into the fermentor. It does not matter if this causes lots of splashing (you will want lots of oxygen in a little while!)
Step Three: Oxygenate Juice and Pitch Yeast
Once you have a full gallon (3.8L) of apple juice in your fermentor, carefully shake the fermentor. This will add oxygen to the juice, which will be needed by the yeast for a healthy fermentation.
Then, pitch your yeast. Yeast will come in either dry or liquid forms. The majority of these can simply be added to your cider without any additional preparation.
Most yeast packets have enough cells to ferment five gallon (3.8L) batches. Since this recipe is 1/5 of that, you will only need to pitch about a quarter of the yeast packet.
Now that your yeast has been added, put your airlock on top of the fermentor. If the inside of the carboy/fermentor neck is wet, the rubber stopper will want to slip out. You can either dry this with a towel that you have ensured is very clean, or you can attach a rubber band to the handle of the carboy to hold the stopper down.
Optional Step: Take a Gravity Reading
If you would like to know how strong (alcohol content or ABV) your finished cider is, you will need to take a ‘gravity’ reading at this time. The gravity is essentially the density or how much sugar is dissolved in the liquid (juice).
A gravity reading can be taken with either a hydrometer or a refractometer. A hydrometer is slightly easier to use, but refractometers need less of your juice/cider to obtain a reading.
To use a hydrometer, you will simply fill a sanitized cylinder or tube up with the juice and drop the sanitized hydrometer in. Read the level at the meniscus of the liquid. If you have adequately sanitized everything, this juice can be added back into your fermentor.
I have an article dedicated to how to use a refractometer, here.
Second Optional Step: Add Pectic Enzyme
Beverages that are fermented from fruit can have pectin present. Pectin is a molecule that hold fruits’ fiber together. When pectin is not sufficiently broken down during fermentation, a cloudiness can form. Pectic enzyme is a widely available product that can be used to successfully combat this pectin haze.
I recommend adding the pectic enzyme along with the yeast prior to fermentation. If you forget, it can definitely be added later on in the fermentation, but it tends to work better earlier on.
If you want the clearest cider possible, please read this article for recommendation.
Step Four: Let the Cider Ferment
At this stage, the yeast will be actively turning the sugar from the juice into alcohol and carbon dioxide. You will likely notice that within 24 hours or so, the airlock will become active. If your fermentor is clear, you will also notice active swirling of the juice.
Active fermentation will likely proceed for 3-5 days, and then slow down.
I recommend letting fermentation proceed for about 2 weeks.
Step Five: Bottle Your Cider- Prepare Bottles
Now that the cider has fully fermented, you can bottle it!
You will want to clean and sanitize enough bottles to package your cider. I would recommend preparing about ten 12oz bottles.
I recommend either crown top or swing top bottles. You will have to have a bottle capper if you want to go the crown cap route.
The screw top style bottles will work as well, but sometimes they do not hold carbonation quite as well.
Optional Step: Take Final Gravity Reading
If you took an gravity reading prior to fermentation, that woould be called the original gravity. You will now need to take a gravity reading known as the final gravity. If both of these gravities were taken with a hydrometer, you can use this calculator to get the alcohol by volume (ABV).
If the original gravity and final gravity were taken with a refractometer, you will need to use this refractometer calculator instead. Use the second one down that uses Brix instead of specific gravity.
Step Six: Bottle Your Cider- Add Priming Sugar
If you want your cider to be carbonated, you will have to add priming sugar at this time. Dextrose (corn sugar) is used most often, but any fermentable sugar will work. Please use a calculator, such as this one, to determine the amount of priming sugar needed.
I have found that 20 grams of Dextrose makes for a good carbonation level in one gallon of cider.
When adding priming sugar, make sure to boil it with a small amount of water to ensure that it is sterilized.
If you prefer your cider to be ‘still’ or not carbonated, you can skip this step.
The reason that we add additional ‘priming sugar’ to the cider prior to bottling is that the yeast will consume this additional sugar to make more carbon dioxide. However, instead of this carbon dioxide escaping through an airlock, since the bottle is sealed, it will remain in the cider.
Step Seven: Bottle Your Cider- Siphon Cider into Bottles
To bottle your cider, you will want to put your fermentor slightly higher than than the bottles. Clean and sanitize your siphon and hosing.
Put the siphon into the cider, keeping the end away from the yeast sediment layer at the bottom of the fermentor.
Place the end of the hose in your first bottle to be filled.
Simply pump the siphon twice to get the flow of cider started. As the cider gets near the top of the bottle, move it quickly to the next bottle. You can pinch the tubing to stop the flow of cider if needed. Once you have bottled the whole batch of cider, cap all the bottles and store at room temperature.
You will want to let the bottles sit at room temperature for about 2 weeks to let them bottle condition (carbonate).
For a more detailed look at the bottling process, please see my article here!
Step Eight: Drink Your Cider!
Now the fun part has come!
After 2 weeks of bottle conditioning, I recommend placing the bottles in the refrigerator for at least 24 hours before drinking. This will help to let all the yeast settle at the bottom of the bottle.
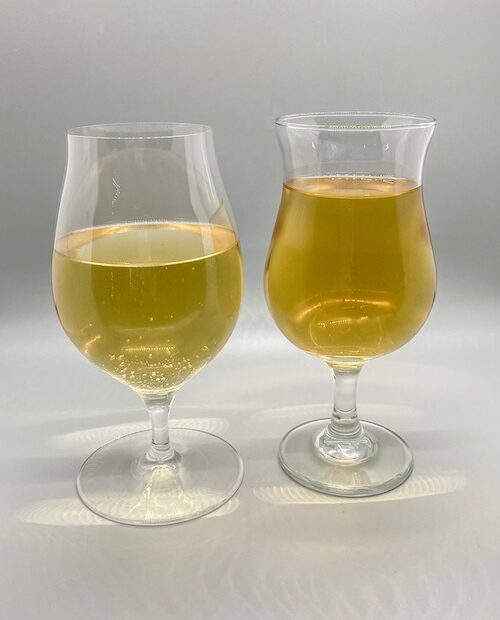
Pour your cider into a glass, leaving the last half-inch (1.3cm) of cider to avoid transferring any yeast into your glass.
Enjoy this fine creation you have made!
As with most alcoholic beverages, the brewing process can be intimidating at first. However, once you get going, you’ll see how easy and satisfying it can be. I highly recommend just giving it a go!
Tips:
Yeast Choice:
There are a great variety of yeasts that you can use to ferment cider. As noted before, some of these will leave more residual sugars than others. Many champagne yeasts will ferment to dryness, meaning that they will leave nearly no sugar behind.
Some yeasts can also lend their own flavors to the cider. Many yeasts can lend fruity notes, which play well with cider.
Likely the easiest yeast to use with cider is Safale S-04. It has a temperature range of 64F-72F (17.8C-22.2C), which I feel falls in most people’s average house temperatures. S-04 will not ferment completely to dryness, which can given a fuller flavor to the finished cider. It also ferments fairly quickly.
If you do want a cider that is very dry, I recommend using a champagne yeast like Lalvin EC-1118. I’ve had great success with this yeast fermenting both ciders and mead.
They do even make yeast strains specifically designed to ferment cider, such as Safcider. I do not have any personal experience with these yeast strains, but some people swear by them!
My personal favorite for making cider is White Labs Burton Ale Yeast. This yeast lends notes of apple and pear that pair very well with cider.
I have also had good experience using the ever-popular Kveik yeasts. These are very interesting strains that have a very wide temperature range. At normal room temperatures, they tend to ferment fairly cleanly. However, if you ferment them warm (ie 90F or 32C), they can provide very fruity flavors.
Make Hopped Cider!
Cider with hops added can be a real treat! There is a larger variety of hops now than ever before in the past. There are hops that lend earthy, spicy aromas and flavors all the way to hops that contribute tropical and citrus fruit notes!
You can get very creative with hop choice.
Hops can be added using the ‘dry hop’ method. I talk more in depth about dry hopping in this article.
Basically, you will add the hops after the cider has been fermenting for 4-5 days. This will avoid losing the flavors and aromas you are trying to get from the hops.
Transferring Cider to Secondary Fermentor
Now, if you want to get even clearer and cleaner tasting cider, you can transfer it to a secondary fermentor prior to bottling.
Transferring your cider will leave lots of yeast behind, and let even more yeast settle out of suspension while in the secondary fermentor.
You will simply want to siphon your cider from the primary fermentor into another sanitized one gallon vessel.
I recommend adding a half tablet of Campden (potassium metabisulfite) to the secondary fermentor when transferring. Campden tablets help to sterilize and reduce oxygenation of your cider. Though oxygen is necessary for yeast growth initially, you want to reduce oxygen exposure in your cider after fermentation has completed.
It is worth noting, if you are trying to avoid ‘sulfites’ in your cider, do not add Campden. Campden is not necessary, but I do believe it increases the quality of the finished product.
Now you will slowly siphon the cider from your primary fermentor into this new glass carboy. It helps if you put the fermentor with cider in it higher than the one that the cider is flowing into. Stop siphoning when you get to the yeast layer.
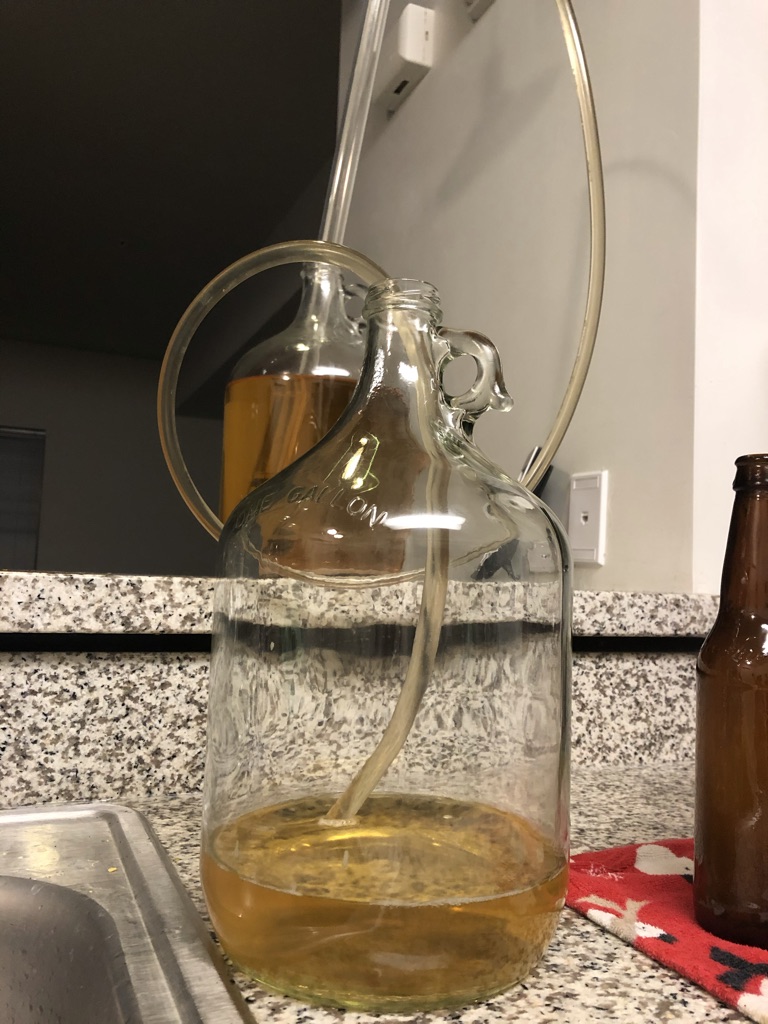
Once the transfer is complete, put an airlock on your secondary fermentor and let it sit for another couple weeks.
Should I Transfer Cider to Secondary?
Transferring your cider into a secondary fermenter will significantly increase clarity and cleanness of your finished cider. The risk of transferring to another vessel are contamination and oxygenation. However, with good technique, and especially if you are using Campden, these risks can be mitigated almost completely.
You can repeat the transferring process as much as you would like until you are getting the clarity you desire.
Another way to speed up the ‘clearing’ process is by cold crashing the cider. I discuss cold crashing in detail in this article.
If you do let your cider sit in secondary fermentation for awhile, you may want to add bottling yeast to your cider when bottling. Much of the healthy yeast can fall out of suspension when performing secondary fermentations, which is necessary for bottle conditioning to proceed later. You can simply add a small portion of bottling yeast when you add your primary sugar to the cider before bottling.
Backsweetening
If you are interested in getting similar flavors to the popular ciders like Angry Orchard, Woodchuck, etc., then you may want to backsweeten your cider.
Backsweetening is the act of adding additional sugar (can be in the form of juice) to the cider without the sugar fermenting.
To perform this, you will need to make sure that the yeast present is not healthy enough to ferment more sugar.
Add 1/2 tsp (2.5mL) potassium sorbate to the cider. Let the cider sit for at least 24 hours.
After 24 hours have elapsed you can add cane sugar, honey, apple juice, or any other sugar you would like to backsweeten the cider.
The biggest issue with backsweetening for most homebrewers is when it comes to bottle conditioning. Since you have essentially stopped the yeast from fermenting any more sugar, bottle conditioning is nearly impossible.
This is not an issue if you like ‘still’ cider. If you want carbonated cider, you can either use a kegging system or even a Soda-Stream option.
Make Perry!
Perry is a beverage just like cider, but instead of being fermented from apples, it’s fermented from pears! It definitely has a slightly different aroma and flavor, but it’s just as delicious in my opinion. You can follow the exact same steps in this article to make perry.
Thank you for stopping by!
If you’re ready to take the plunge, I have a recipe for perry/pear cider and a recipe for dry-hopped cider! However, you can just follow this how-to article and make a clean, pleasant drinking apple cider!
If this article was interesting, and you would be interested in brewing either beer or mead in the future, follow this link for my how-to articles!
I am active on both Facebook and Instagram, if you have any questions, feel free to contact me there!