Have you ever wanted to make this age-old and delicious beverage on your own? In this article, I’ll show you how to brew one gallon of mead at home!
There are benefits of starting with one gallon batches of mead as you can keep costs for ingredients and supplies low while learning the craft, and since you will not generally be drinking as much volume of mead at a time as you would, say, beer!
Homebrewers coming from making beer will notice that the mead brewing or mead making process is less complicated up front. However, aging times are longer, so you do have to wait a bit more time to enjoy your creation!
What is Mead?
At its simplest, mead is an alcoholic beverage made from honey, water, and yeast.
Sometimes called, honey wine, mead can come in many different varieties. For example, mead can be brewed with fruit (Melomel), spices (Metheglin), apples (Cyser), grapes (Pyment), or even barley that’s often used in beer making (Braggot). Mead can be made to taste very dry, meaning that most of the sugars have been fermented out by the yeast. On the other hand, you have dessert meads that have some residual sugar, leaving it tasting much more sweet and full.
Mead can be carbonated similar to beer, or it can be left ‘still’ with no carbonation, similar to your favorite wines.
Mead is generally accepted to be the world’s oldest alcoholic beverage. You can thank mead for the term ‘honeymoon’, as in medieval times, the bride and groom were provided enough mead to last ‘one full moon’. The drink was thought to provide the newlyweds with good luck.
Resources for Mead Making
If you want to learn more about mead, there are several great books (many of which I have read) on the topic. Two of my favorites are The Compleat Meadmaker by Ken Schramm (founder of Schramm’s Meadery) and Make Mead Like a Viking by Jereme Zimmerman. The reason that I like the two of these is that they both discuss processes and ideologies on making quality mead, but they do so in much different ways.
I personally like to gather the most information that I can, then go about things in the way that makes the most sense to me.
Before we get to the ‘how-to’ section, there will be some references to making beer throughout the article. However, I want to make it clear that, in no way, do you have to have any experience brewing beer to make quality mead. It’s my opinion that the process of making mead is much simpler than making beer, even!
It is worth noting that some of the pictures used in this article were taken when I made a rhubarb mead; thus, you may see that the water has a pink hue, that is the reason!
How to Brew Mead
Step One: Get Ingredients
As noted above, all that is truly required to make mead is honey, water, and yeast. However, as with many things in life, the quality of the ingredients you get can make a big difference.
- Honey: I generally try to source good quality local honey; however, honey from the grocery store works as well! Clover and Orange Blossom varieties tend to work well with shorter aging times. Some stronger honeys, such as Heather varieties, can make wonderful mead, but they will take longer to age to perfection. You will need about 3 pounds of honey for ~11% ABV mead. You can adjust this in either direction if you would like your mead to be stronger or weaker.
- Water: For making mead, as long as you have water that tastes okay to drink, it should be just fine. If your local water is not the tastiest, then you can use your favorite bottled water.
- Yeast: I recommend a yeast made for brewing vs generic, grocery store-bought yeast. Specifically, wine or Champage yeasts work very well. My favorites are Lalvin EC-1118 and Red Star Premier Cuvee Wine Yeast. I will go into more detail on yeast choice in Step Four!
Optional (but helpful) Ingredient: Yeast Nutrient
Yeast are living organisms that require certain conditions to work at their best. Sufficient nitrogen is needed by the yeast for growth and metabolism. When you brew beer, grain adds this nitrogen for the yeast. Honey does not contain enough nitrogen for the yeast to be content.
The most convenient way to add nutrients to your mead is to add raisins. However, there are products that are made specifically for this purpose. I prefer to use Fermaid O and/or Go-Ferm Protect as my yeast nutrients. This can be purchased fairly inexpensively from your local homebrew shop or Amazon. There are protocols out there that also use Fermaid K, and DAP (diammonium phosphate).
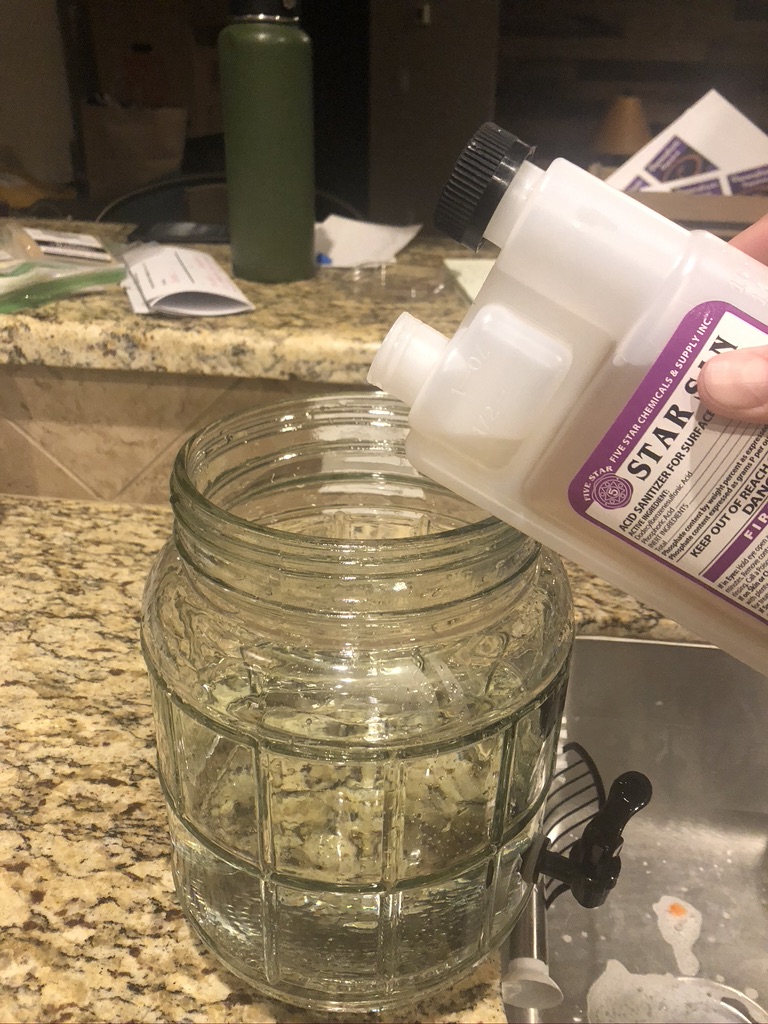
Step Two: Collect and Clean Supplies
Once you have your ingredients purchased, get your supplies organized and clean. You will need the following items to make your first batch of mead:
- Hydrometer/Refractometer
- Large Spoon
- Fermentor (a simple small glass carboy does the trick as well)
- Airlock
- Thermometer
- Sanitizer
I recommend cleaning everything you are going to use for the actual mead making process including your fermentor, thermometer, large spoon, and airlock with soap and water. Once they are cleaned, I would also recommend filling a pot/bucket full of sanitizer, so that you can sanitize these items as well. It is necessary to sanitize everything that will touch your mead as this will get rid of any bacteria or wild yeast that would love to find its way into the sugary beverage!
For sanitizer, I prefer to use an acid-based sanitizer like Star-San, as you do not have to rinse it like you would bleach, and it is food-safe.
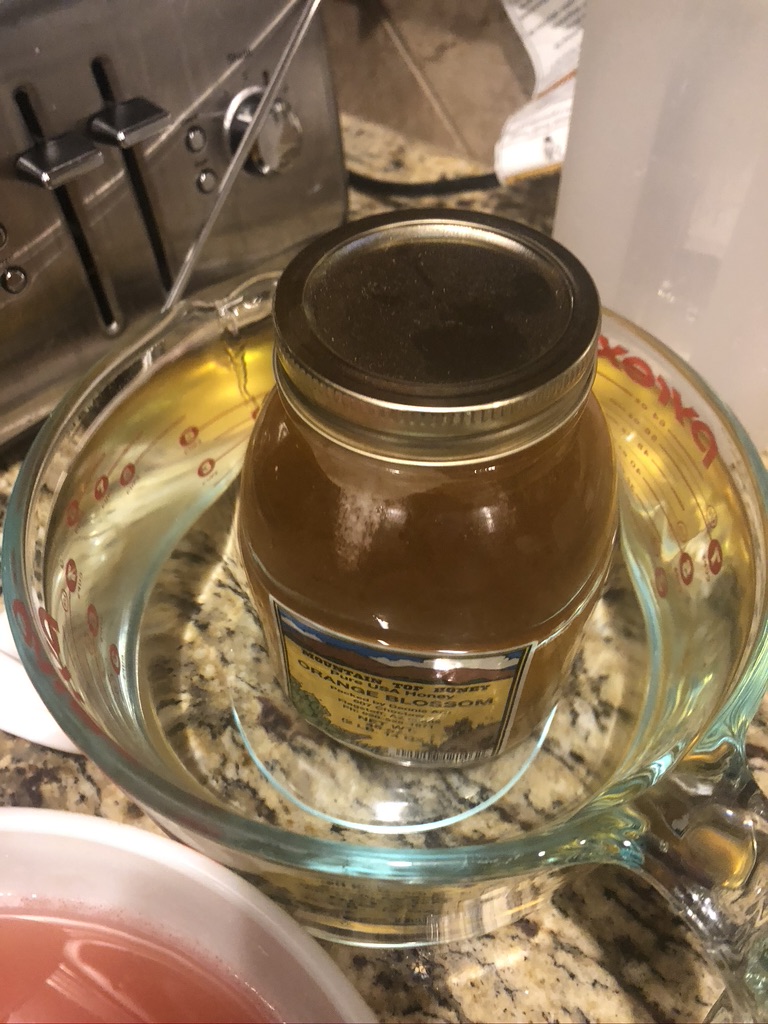
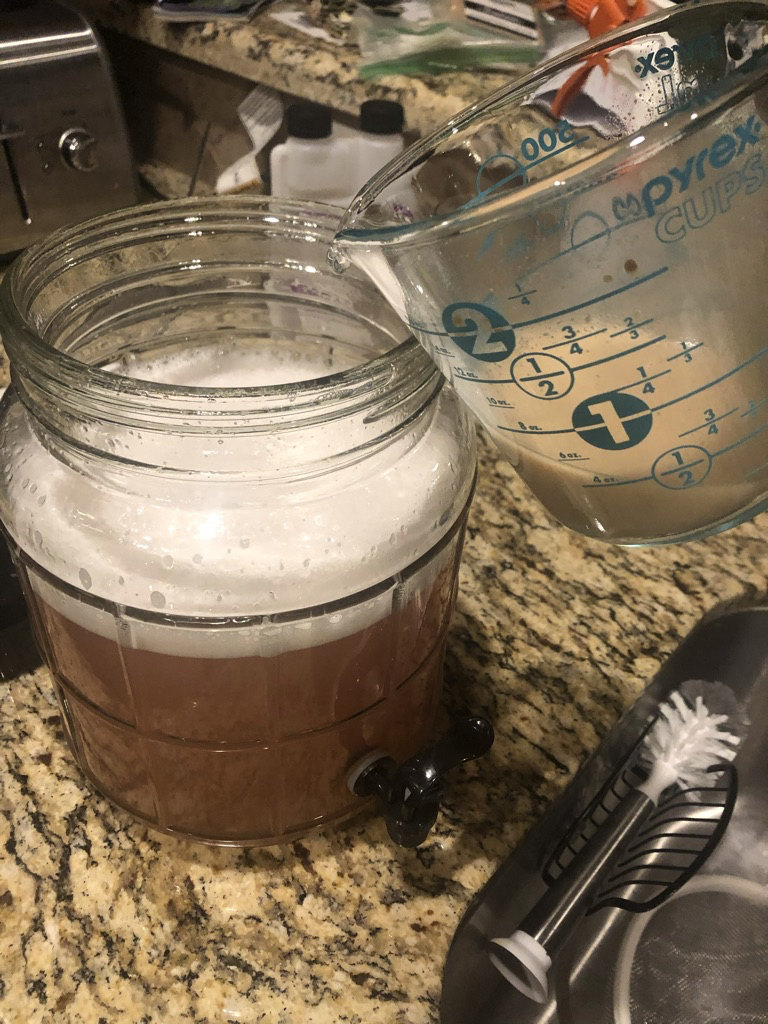
Step Three: Add Warm Water to Fermentor
Once all your supplies are clean, it is time to add the water. Add 0.5-0.75 gallons of warm water to either a sanitized fermentor or a sanitized pot. I recommend the temperature of the water be in the 120-130F range.
There is some debate on this in the literature, as some mead makers recommend adding honey to boiling water. What I have found to be the consensus is that boiling honey can significantly reduce vital flavors and aromas that you want present in your finished mead. Honey is also naturally has antiseptic properties, so as long as you keep the rest of your process clean and sanitary, the risk of infection should be very low, even without boiling the water.
During this step, I also recommend putting your jar/jars of honey in some warm water as well. As you know, honey is very viscous, so letting it sit in some warm water for a few minutes will help it pour better later!
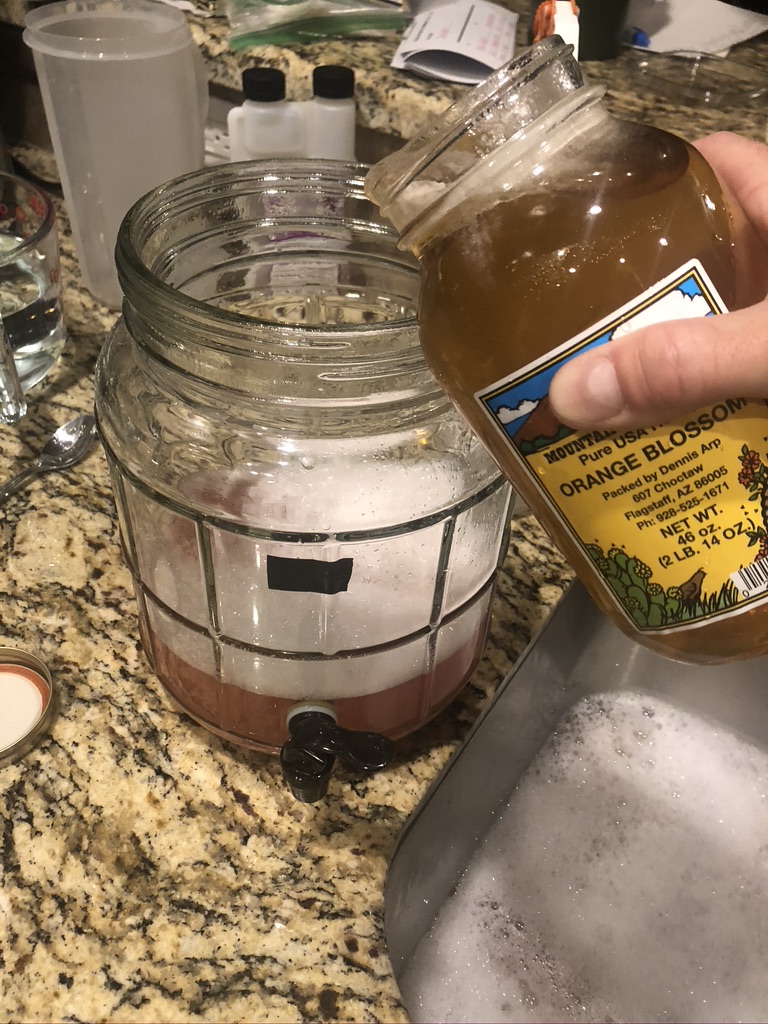
Step Four: Add Honey to Warm Water
The time has come to add your honey!
Slowly pour the contents of your honey jars or bottles into the warm water. As you pour it in, stir in the honey with a sanitized spoon. If you are using a glass carboy, you can use the skinny end of your spoon to stir the honey in (just make sure the spoon handle is sanitized!).
Add some warm water to your honey jar and shake it to make sure that you get every last drop of honey for your mead! Honey isn’t cheap these days!
At this point, this mixture of honey and water is called must. Must is basically the equivalent of wort when making beer.
When mixing the honey in with the water, do not be afraid to stir or shake the fermentor vigorously (but carefully). Not only do you want the honey to be fully mixed in with the water, but the oxygen that is produced with shaking or vigorous stirring will be extremely helpful for the yeast during fermentation.
If you want to get fancy, you could even purchase a de-gasser wand that attaches to a household drill that makes the stirring process very easy!
However you do it, it is extremely important that you add oxygen to the must at this time!
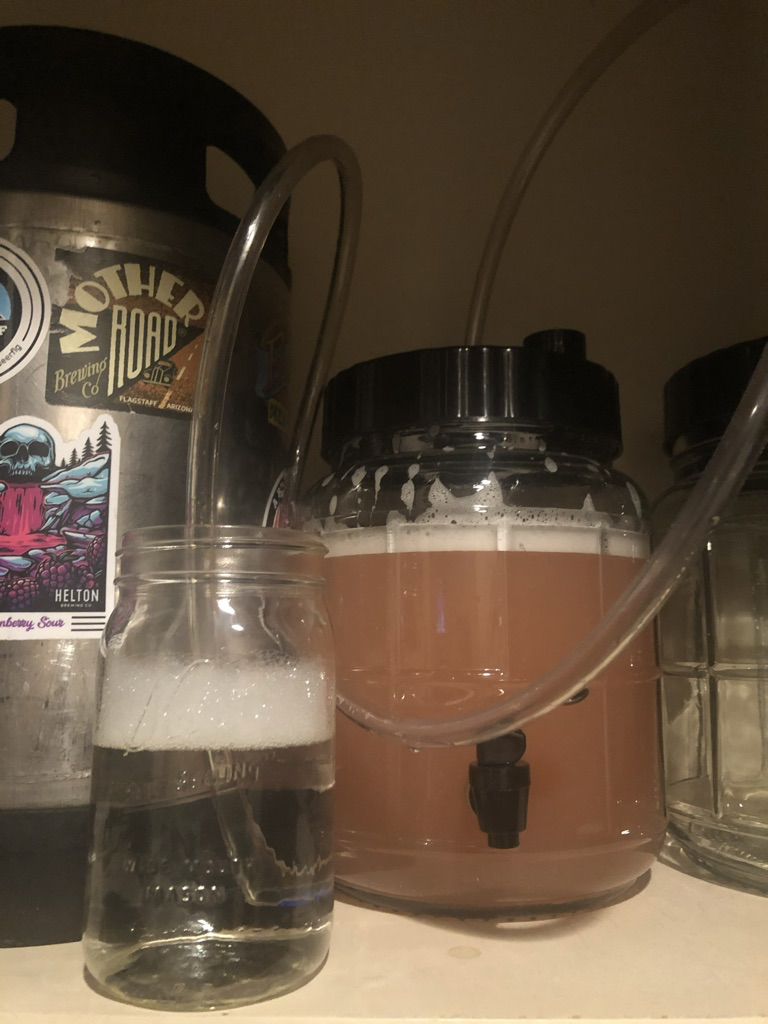
Black electrical tape marks the 1 gallon line
Once honey has been added, top off your fermentor with water to a volume of one gallon.
This is also the time that you will want to take a gravity sample. Measuring the strength or original gravity at this time is necessary to figure out the alcohol by volume of the finished mead. Use either your hydrometer or refractometer to take a reading and write this down.
If you need further information on how to use a refractometer, please click here.
Step Five: Add the Yeast
Once you have shaken and stirred your fermentor full of honey and water mixture well to ensure there is adequate oxygen inside, it is time to add the yeast!
Best Yeasts for Mead
There are a great variety of yeast choices out there. The yeasts that are most often used to produce mead are wine yeasts. For most of the meads that I make, I use Lalvin EC-1118. I like this yeast because it has a wide temperature range 45-95F, so it is much more forgiving if a room gets warmer one day. Some yeasts will start to produce undesirable flavors if they are fermented at temperatures higher or lower than its preferred range.
Other things you want to consider when choosing a yeast are the alcohol tolerance of the yeast, and whether you want your mead on the sweeter side or the drier side.
If you are trying to produce a full-bodied dessert mead, possibly with additions of chocolate, vanilla, and fruits, you would likely want to choose a yeast that will leave some residual sugar in your mead. On the other hand, if you are trying to produce a dry traditional mead, you would want to choose a yeast that eats up all of the sugars.
Alcohol tolerance of yeast is also very important as most meads finish in the 11-14%ABV range. Many ale yeasts that are used to produce beer do not tolerate alcohol ranges this high; and thus, will not fully ferment your mead. However, if you are trying to make a low alcohol mead quickly, an ale yeast could be an option!
Common Yeast Choices for Mead:
Lalvin EC-1118: An all around great choice for making drier meads. Can tolerate up to 18% ABV. Will tolerate a large range of fermentation temperatures.
Red Star Premier Cuvee Wine Yeast: Another very clean yeast that will ferment meads to dryness. Essentially tolerates the same temperatures and alcohol levels that EC-1118 does. Very inexpensive!
Lalvin D-47: This yeast is better for sweeter meads. Will leave a fuller mouthfeel in the mead. Tolerates fermentation temperatures of 59F-68F, which is a much tighter window than the aforementioned strains. Alcohol tolerance of 14% ABV.
Safale US-05: If you’ve been homebrewing, you’re probably familiar with this clean fermenting ale yeast. Many people have used this yeast for mead making as well. It will ferment cleanly but has a lower alcohol tolerance (9-11% ABV). Temperature range of 64F-74F.
Step Six: Let Your Mead Ferment
Put the airlock on the top of your fermentor and put sanitizer water or vodka in it. Pro-tip: If you are using a glass carboy, the rubber airlock bungs do not like to stay in place if the glass is wet. You can either dry the inside of the fermentor neck with a clean towel or use a rubber band to hold the airlock in place while it dries on its own.
Airlocks or blow-off tubes allow carbon dioxide, which is a byproduct of fermentation, to escape while keeping oxygen and anything else in the air out of your mead.
Again, the must is pink in this case as I was making a rhubarb mead
This is where the patience associated with mead making must start. A big difference between making mead vs beer/cider is the prolonged fermentation time and aging time.
As long as you have given your yeast enough oxygen and nutrients, your mead should start fermenting within the first couple days. If your fermentor is clear, it is very interesting to watch the fermentation proceed!
If you are used to beer/cider fermentations, you will likely notice that active fermentation proceeds for a longer period of time with mead. This is normal.
Step Seven: Add Additional Yeast Nutrient (Optional)
If you want to give your yeast the best chance at making exceptional mead, help it out by giving it nutrients!
As I stated earlier, you can simply add some raisins from the get-go, and the yeast should have a decent amount of necessary nutrients.
However, I, along with many other mead makers prefer to give the yeast nutrients throughout the fermentation process. I like to use staggered yeast nutrient additions. I add additional nutrient on days 3 and 5 of fermentation. Others prefer to add nutrient on days 2, 4, and 6. The schedule itself is a personal choice, but I would highly recommend adding more nutrients as fermentation progresses.
How Long Does Mead Take to Ferment?
Primary fermentation of mead generally takes around 2 weeks. The biggest factor regarding fermentation time is the strength of the mead. Weaker meads, also known as session meads, may only take about one week to ferment. However, stronger meads, often called sack meads, can take over a month for primary fermentation to complete.
The best way to determine if primary fermentation has completed is to take gravity samples with your hydrometer or refractometer over 2-3 days. Remember that if you are using a refractometer, you will have to use a calculator to determine the actual final gravity as the reading is thrown off by alcohol content.
You will know that your mead has finished fermentation if these gravity measurements do not change over a period of several days. If your gravity is less than 1.000, you can also be fairly certain that primary fermentation has completed.
Step Eight: Bottle or Transfer to Secondary Fermentor
At this point in the mead making process, you have a choice to make.
If your goal is to be able to drink this mead as quickly as possible, you can bottle the mead at this time. However, if you are trying to produce the best quality mead that you can, I would recommend transferring to secondary. All that ‘transferring to secondary’ means is moving the mead to a different glass carboy or similar, leaving the yeast behind.
I will proceed to discuss transferring the mead. If you would like to bottle at this time, feel free to skip ahead in the article or check out my comprehensive article on how to bottle!
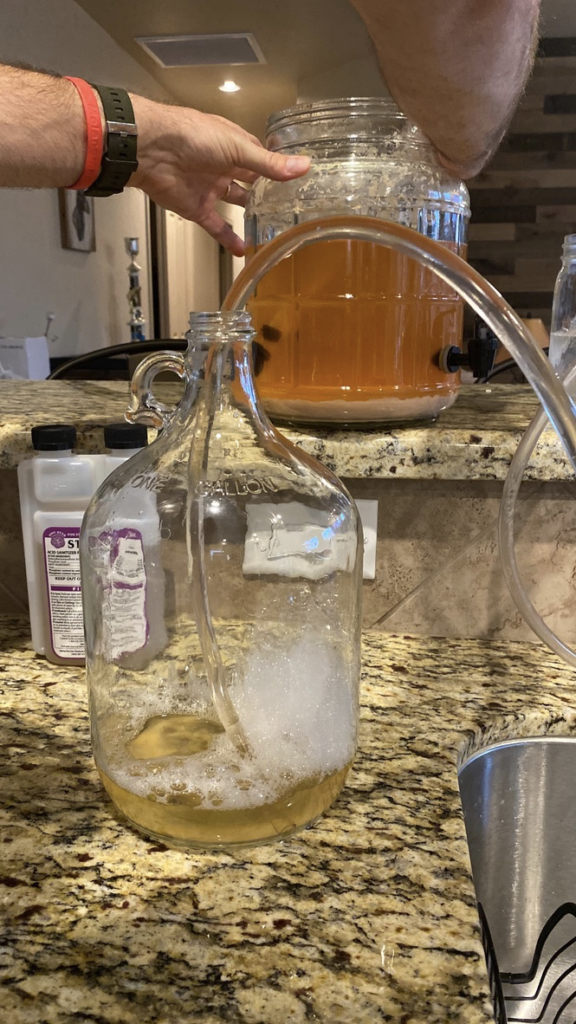
Clean and sanitize a separate fermentor.
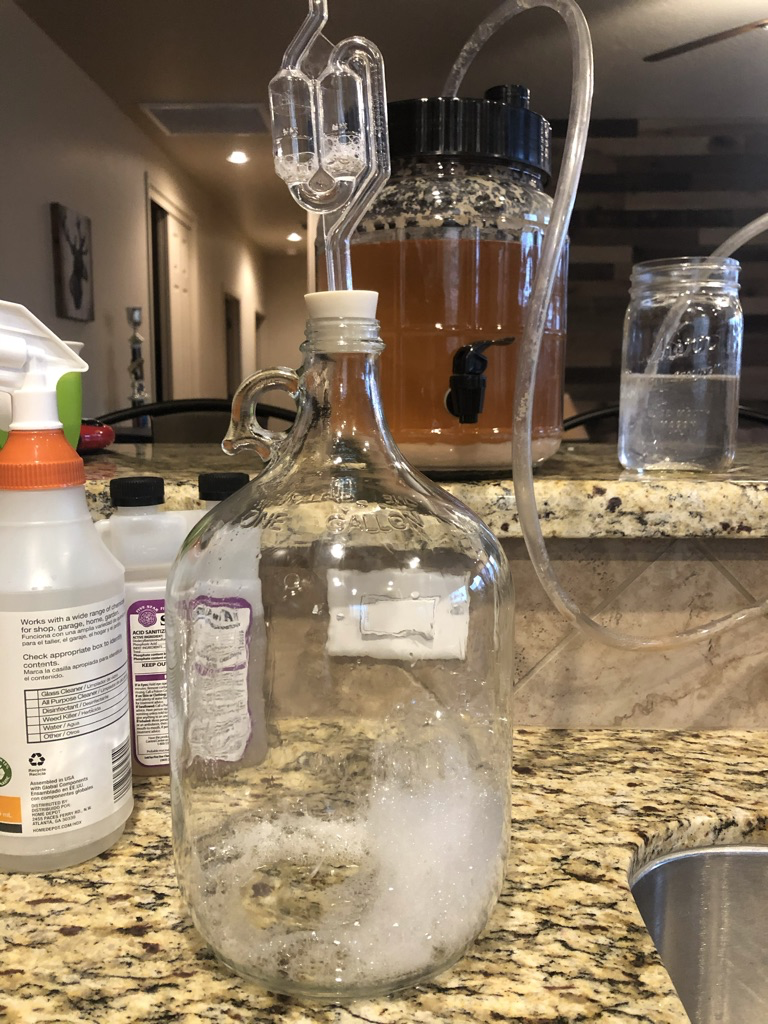
Clean and sanitize your siphon and tubing.
I recommend adding a half tablet of Campden (potassium metabisulfite) to the secondary fermentor. Campden tablets help to sterilize and reduce oxygenation of your mead. Though oxygen is necessary for yeast growth initially, you want to reduce oxygen exposure in your mead after fermentation has completed.
It is worth noting, if you are trying to avoid ‘sulfites’ in your mead, do not add Campden. Campden is not necessary, but I do believe it increases the quality of the finished product.
Now you will slowly siphon the mead from your primary fermentor into this new glass carboy. It helps if you put the fermentor with mead in it higher than the one that the mead is flowing into. Stop siphoning when you get to the yeast layer.
Once the transfer is complete, put an airlock on your secondary fermentor and let it sit for another couple weeks.
If there is a lot of head space (space between mead and top of fermentor) in the new fermentor, you can add either water or honey water to decrease this.
Should I Transfer Mead to Secondary?
Transferring your mead into a secondary fermenter will significantly increase clarity and cleanness of your finished mead. The risk of transferring to another vessel are contamination and oxygenation. However, with good technique, and especially if you are using Campden, these risks can be mitigated almost completely.
You can repeat the transferring process as much as you would like until you are getting the clarity you desire. I generally find that transferring twice gives me superb clarity. You can also simply let the mead sit in secondary for a long period of time to clear. Transferring (leaving yeast sediment behind) will just speed up this process.
Another way to speed up the ‘clearing’ process is by cold crashing the mead. I discuss cold crashing in detail in this article.
Step Nine: Bottle Your Mead
Your mead should be looking and tasting great at this time. Let’s get it bottled.
Collect, clean, and sanitize enough bottles for your mead. 1 gallon of mead will generally require about ten 12 ounce bottles. I personally prefer the swing-top or Grolsch style bottles for mead, but any crown-top beer bottle will work well too!
If you want your mead to be carbonated, you will have to add priming sugar at this time. Dextrose (corn sugar) is used most often, but any fermentable sugar will work. Please use a calculator, such as this one, to determine the amount of priming sugar needed.
When adding priming sugar, make sure to boil it with a small amount of water to ensure that it is sterilized.
I also highly recommend adding bottling yeast to your mead if you are adding priming sugar. Reason being, when transferring and clearing your mead, you left much of the yeast behind. For bottle conditioning (carbonation) to proceed, you will need both enough sugar and yeast. If there is not enough yeast to consume the sugar, your mead will not adequately carbonate.
Bottling your mead will look very much like your transferring process. You will simply start the siphon and move the tubing from bottle to bottle. Pinch the tubing to stop the flow of mead if needed. Once you have bottled all of your mead, cap the bottles, and store at room temperature.
If you are not carbonating your mead, it can go directly into the refrigerator if you would prefer. However, carbonating the mead will take at least two weeks at room temperature.
For a more detailed look at the bottling process, please see my article here!
How Long Should I Age Mead?
You should age mead for at least two weeks, but up to multiple years in some cases. As with fermentation time, aging time is very much dependent on strength of mead. Lower gravity, session meads, may only take 2-4 weeks to age and taste great. However, it is recommended to let stronger meads age for 1-2 years (sometimes even more)!
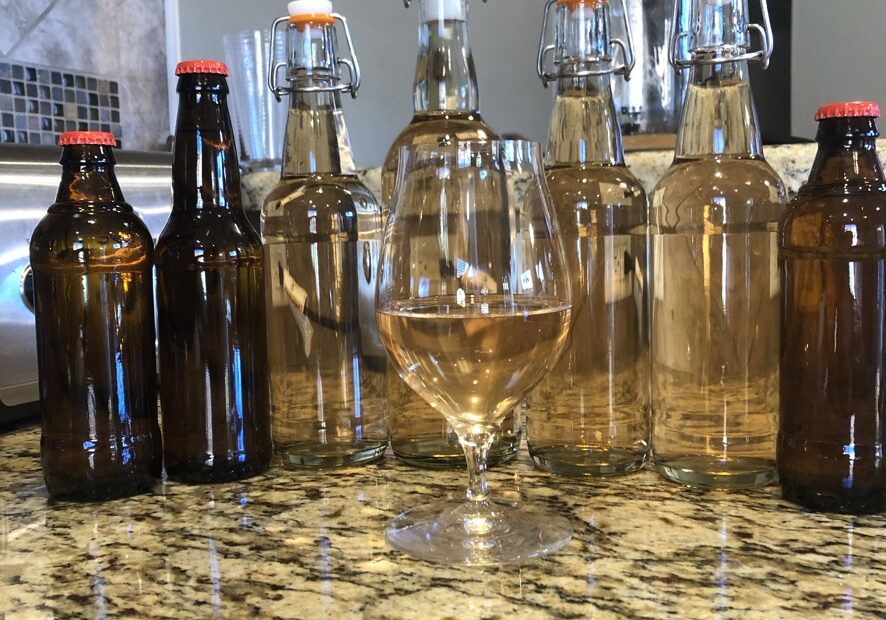
Step Ten: Enjoy Your Mead!
The best part of the process is here, time to enjoy your creation!
I would recommend pouring it into a clear glass, that way you can get a full look at the clarity.
Write down notes, even subtle ones, on the aroma and flavor of the mead. It is interesting to see how these qualities can change over time.
If you really want to get the full experience, pick up a drinking horn, and enjoy your mead like a viking!
In summary, brewing mead can be as simple or complicated as you want it to be. It is worth noting that you do not need to perform the optional things that I discussed in this article to make good mead. However, I did want to include the things that I have learned over the years to help you make the best mead possible!
Other Tips:
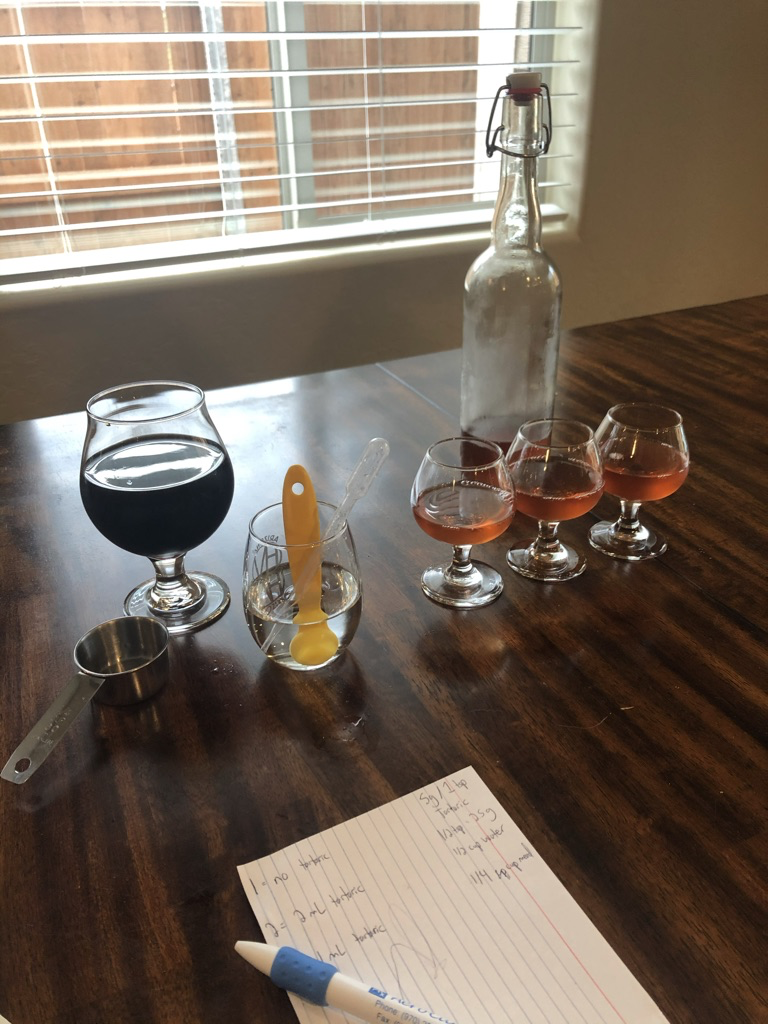
Acid Additions: Tartaric, Malic, Citric Acids
Certain acids can really make flavors in your mead shine.
However, there is no easy answer as to what amounts of acid to add to a specific mead.
I highly recommend setting up a sampler flight with your mead to add different amounts of acid to. If you don’t have any mead that’s ready to drink, pick up a commercial example of your favorite mead to see how the acids affect the overall aroma and flavor of the mead.
To take this to the next level, a friend or family member can set up a blind test for you to really gauge which flavors you prefer!
Most Important Tip: Just Make Your First Batch!
I cannot stress this enough. I know that mead making can sound complicated at first. However, keep it simple at first. Find a good honey, mix it with water, and add yeast. Add some raisins for nutrients. Bottle after a month or so, and see just how simple the process can be!
It’s easy to get bogged down in the details, but as you’ll see after making your first couple batches, it is really not that hard!
It is especially easy with mead to get creative with it, and start to add your favorite spices or fruit!
Thank you so much for stopping by!
I am active on both Facebook and Instagram, if you have any questions, feel free to contact me there!
If you enjoyed this article and would like to read similar articles on how to brew beers, check out my articles on extract brewing and brew-in-a-bag brewing.
For a full list of the supplies I recommend for homebrewing in general, please click here!