In this article, I will show you my method on how to bottle beer from a keg without a BeerGun or similar counter pressure filler. I have used this method with great success for a number of years, many times keeping beers for months-years without spoilage or loss of carbonation.
Step One: Obtain supplies
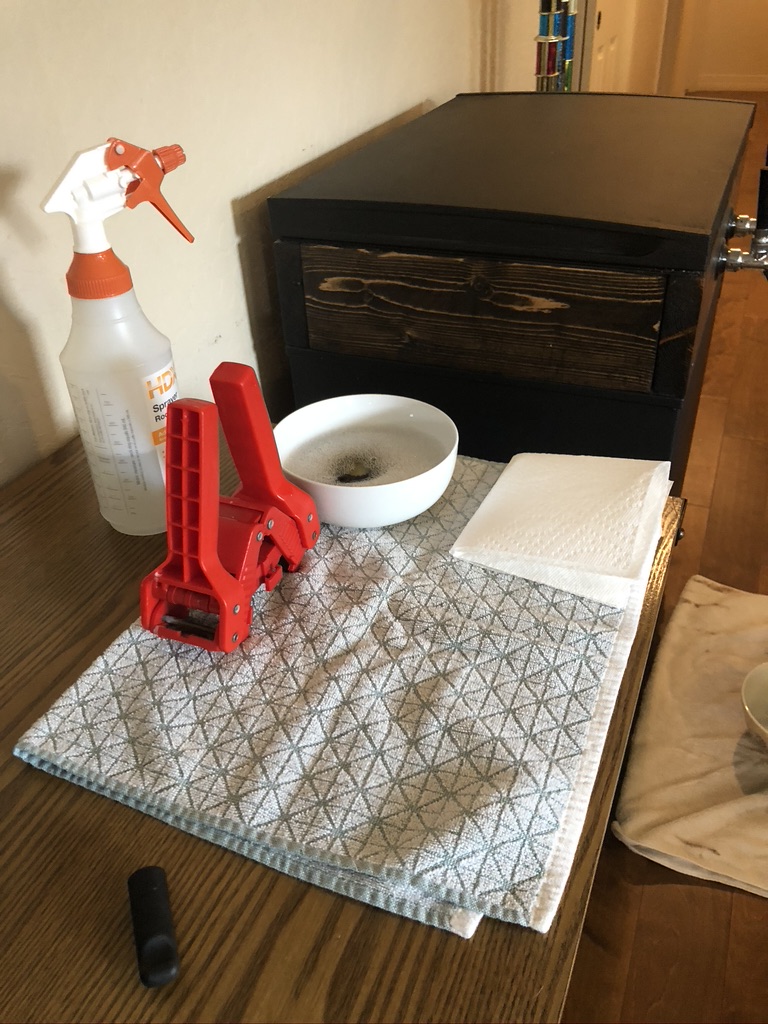
Supplies needed for bottling using this method could not be much simpler. Instead of an expensive counter pressure filler, you just need a short amount of tubing that will fit over your tap faucet. I use about a 12 inch length of tubing with good success. You will also need a selection of clean bottles.
There is a growler filler attachment for my tap faucet (Intertap), which I have yet to use. I have heard good things about this attachment; however, I have had good success without it thus far!
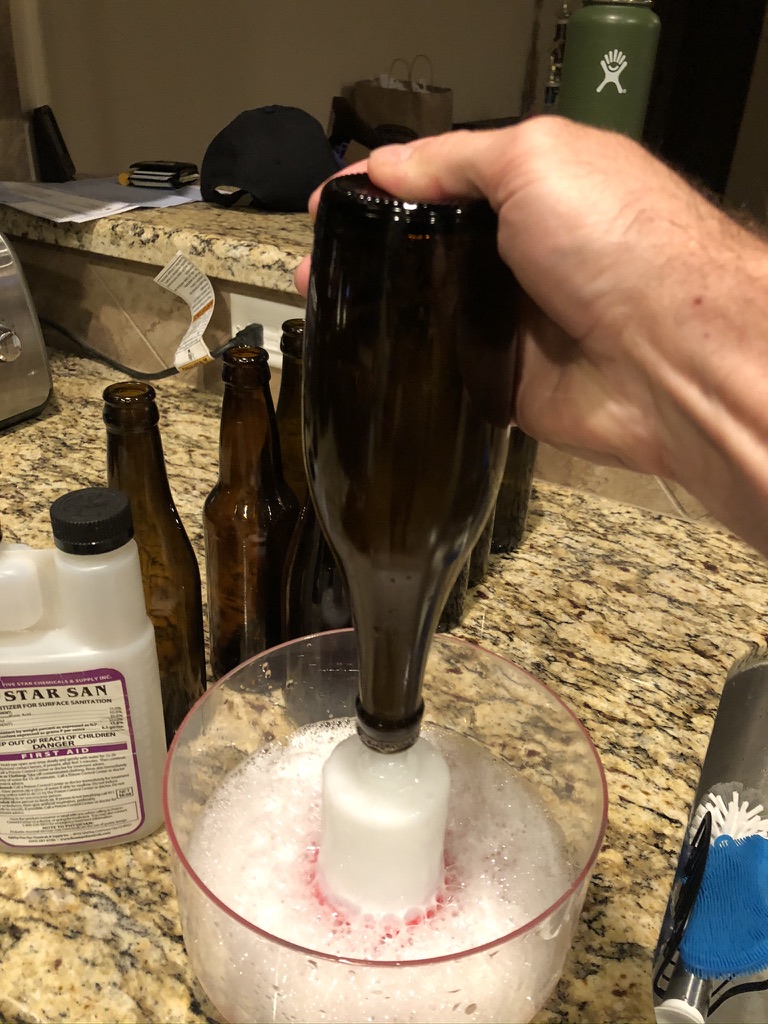
Step Two: Clean and sanitize bottles
The second step in this process will be to clean the desired amount of bottles. The great thing about bottling in this fashion is that you can bottle just a couple beers for friends or you can bottle the whole batch. It is important to both clean and sanitize these bottles as you would if you were bottle conditioning. For more information on my recommended method for cleaning bottles, please see my post here.
It is also important to clean and sanitize the filler hose at this time.
Step Three: Ensure beer is at desired carbonation and temperature level
Bottling in this fashion will only work if the beer is at your desired carbonation level and temperature prior to bottling. Cold liquids hold CO2 more easily than warmer liquids. Due to this fact, it is important to have your beer cold prior to bottling. Whether you burst carbonated your beer or left it at serving carbonation level for 1-2 weeks, make sure that the beer is well carbonated prior to starting this bottling process.
It can help to rinse your bottles with cold sanitizer solution prior to bottling as well.
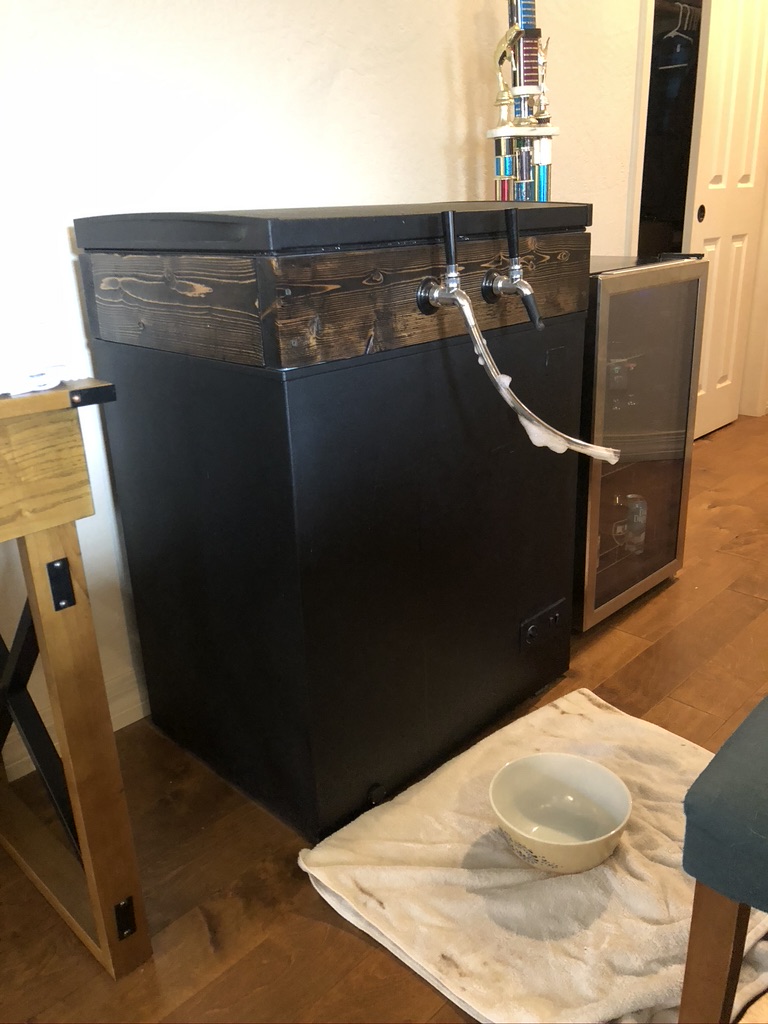
Step Four: Setup bottling area
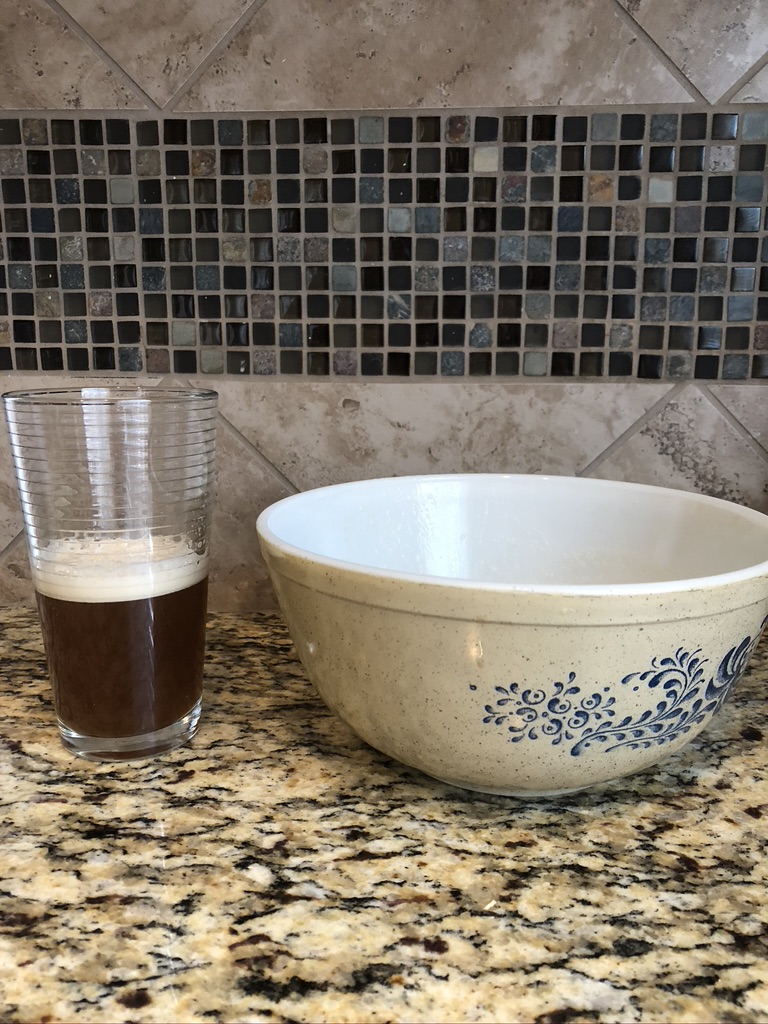
Place your sanitized hose on the end of the tap faucet. I recommend placing a towel and a large bowl under your kegerator/keezer faucet to catch any drippings.
You will also want to set your sanitized bottle caps and bottle capper nearby.
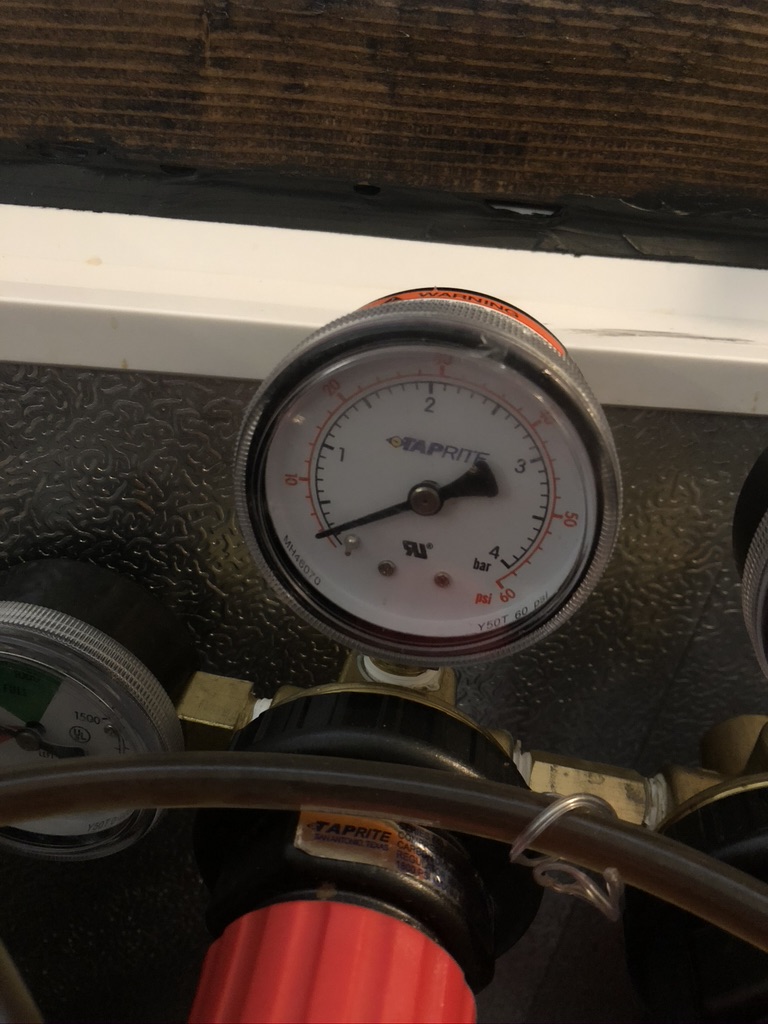
Step Five: Lower keg pressure
This is a key step of having this process work without difficulty. The goal is to have the keg set to the lowest pressure possible where you can still have beer moving into the bottles. Generally the sweet spot is somewhere between 2-5 PSI.
To make this happen, turn your regulator pressure down to zero. Then, purge the keg that you will be bottling from. Finally, increase the pressure on the regulator to 2-5 PSI.
Next, it is important to prime the lines with fresh beer. Depending on how active the drinking from your keg is, the beer in the lines may not be well carbonated. Pour a couple ounces of beer into a glass and either drink or discard (I prefer the former).
Step Six: Bottle the beer
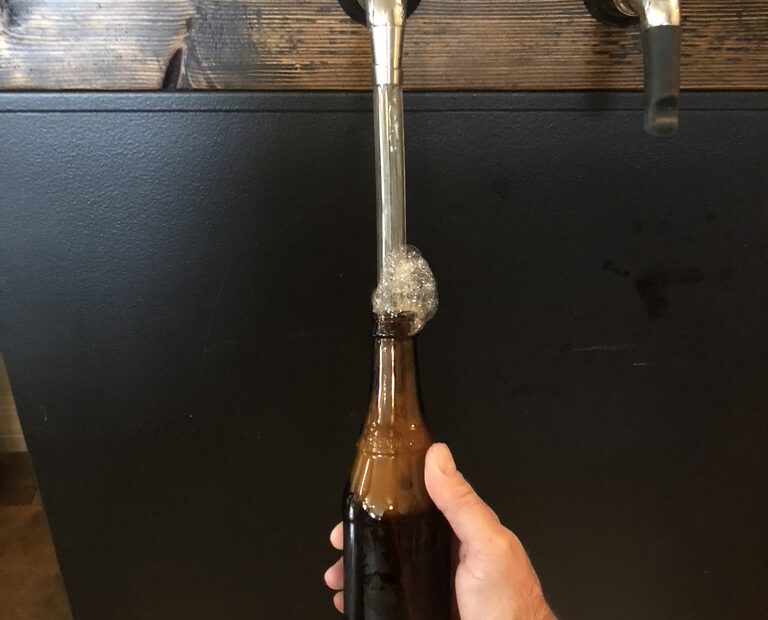
The time has come to actually bottle the beer. You will simply place the end of the sanitized hose into your bottles and open the tap. The beer will slowly fill the bottle. I recommend keeping the end of the filler hose about 0.5-1 inch below the top of the liquid level. This will help to not have a huge head space once the tubing is removed. You will want to keep the tap open until you start to get a little bit of beer flowing out of the bottle.
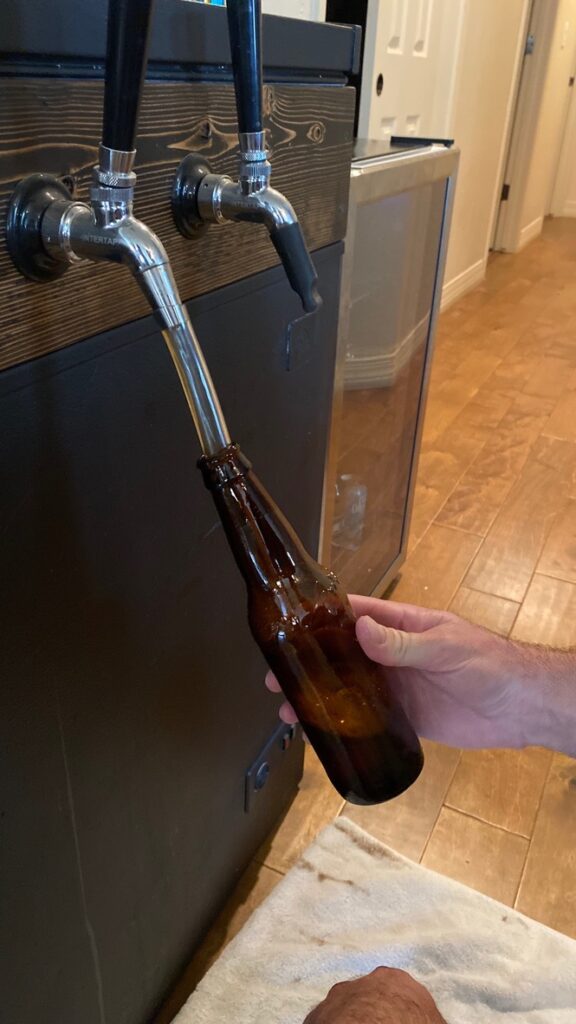
Once you have fully filled the bottle, close the tap, and remove the end of the tubing. You should be left with a small amount of head space filled with foam. When capping the beer, it is important to ‘cap on foam’. The reason for this is that you want the least amount of oxygen in the bottle when bottling, as it can lead to spoilage/oxidation. By capping on the foam, you are reducing the amount of oxygen left over in the bottle.
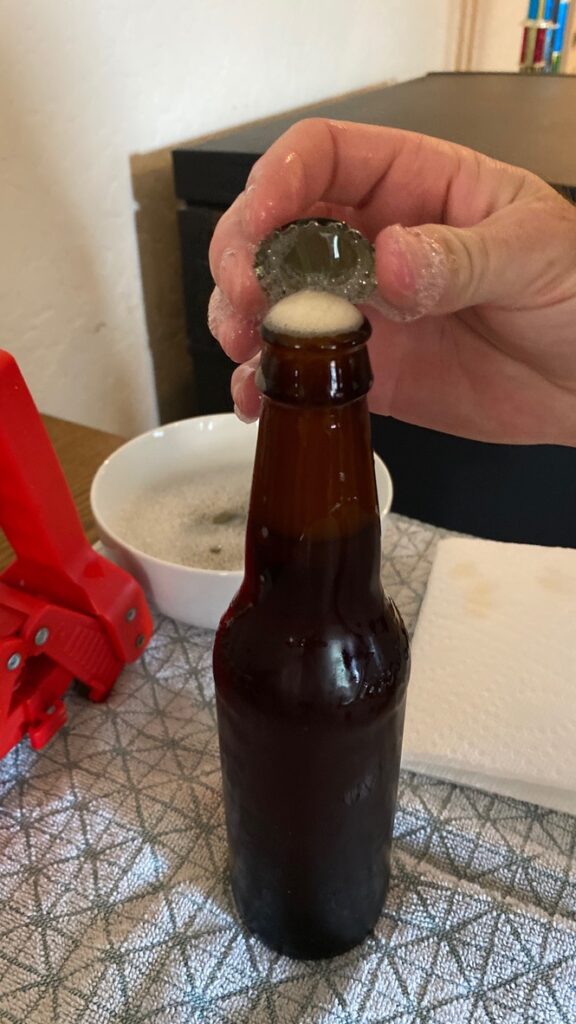
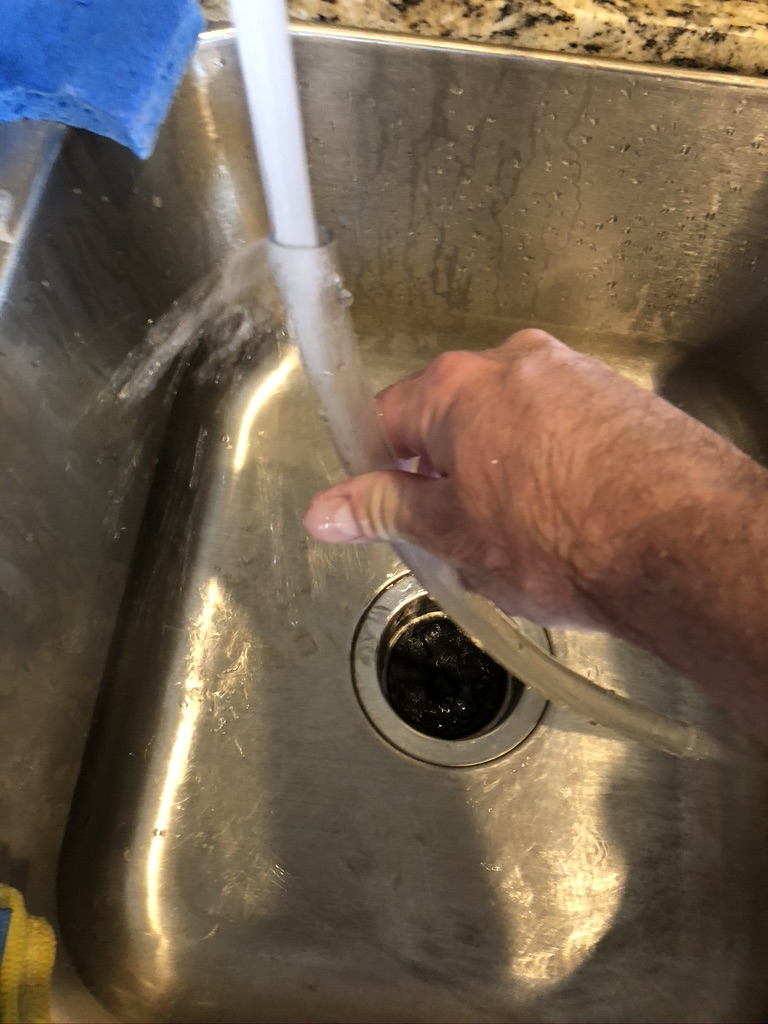
I recommend immediately capping the bottles after filling them. I then like to rinse the bottles with cold water, so that they do not get sticky.
Step Seven: Clean up
Now that you have bottled the desired amount of bottles, you can clean and organize supplies. I do recommend refrigerating the newly filled bottles as soon as possible.
Also, if you did not bottle the entire contents of the keg, don’t forget to increase the keg pressure back to serving pressure (or you’ll be disappointed in a couple days).
The method described above has served me well for about 3 years since building my keezer (chest freezer turned kegerator). I often read posts on social media stating that beer bottled from a keg does not last. However, I can honestly say that I have kept beers bottled in this fashion for 1.5-2 years that were perfectly carbonated and not remotely spoiled.
Some tips that can help further: having extra length in your keezer/kegerator lines can help to prevent foaming when serving or bottling (line length is a subject that could be discussed in detail in another article), and purging bottles with CO2 prior to bottling could ensure further decreased risk of spoilage.
I hope you you enjoyed reading about this bottling method and hope you have as much success as I have over the years using it!
Thank you for stopping by!