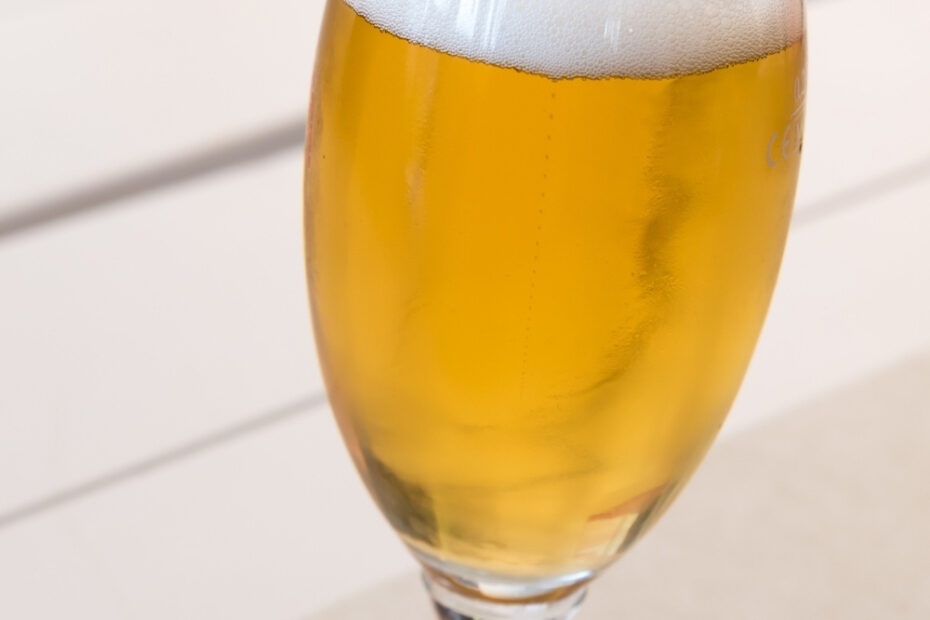
The blonde stout, a beer with the flavor of a stout without the dark color! Always an interesting one to share with your friends and family.The following is my blonde stout extract recipe!
What is a Blonde Stout?
Blonde stouts are often known as white stouts, or sometimes golden stouts.
As stated above, a blonde stout is simply a beer that attempts to mimic the same flavor that a classic stout has without any of the dark color. This includes chocolate and coffee notes that can come from the roasted barley and dark malts.
It is a style that plays with your mind a bit. There is a disconnect between seeing a beer with pale appearance and then you get a rich depth like you would from a dark beer. This is what makes this style so great!
Given that these flavors generally come from the roasted and dark malts, it can be tough to acheive the same aroma, flavor, and mouthfeel in a light beer.
How To Obtain Stout Flavors in a Light Beer?
To obtain these stout-like flavors in a pale beer, we will have to use adjuncts. Adjuncts, in homebrewing, are simply anything other than barley, water, yeast, and hops.
The adjuncts that will help us obtain the aroma, flavor, and mouthfeel in a blonde stout without darkening the beer significantly are coffee, cacao nibs, vanilla, and possibly lactose.
Depending on what exactly you’re going for with your blonde stout, you could even add spices like cinnamon or nutmeg! I’ve had some really solid pale stouts with these additions.
There are also things you can do with your grain bill to get the right mouthfeel. Additions of rolled oats and flaked barley help you obtain a thicker mouthfeel like you would get in a stout. Maltodextrin can be used to increase body and mouthfeel. Lactose is a non-fermentable sugar that can also add sweetness and body to a beer.
When choosing your base malt/extract, keep in mind that you want to keep the color as light as you can. Some of these adjuncts will increase the darkness slightly, so as light as you can keep the base recipe, the better!
Smoked Malt
Small additions of smoked malt can also go a long way with acheiving some smoky, roasty notes in a light beer. It is important to use smoked malt sparingly. You can quickly overpower a beer by using too much! I chose to use cherry smoked malt in this recipe.
The following recipe is for an extract beer. However, you could simply substitute the Pilsen extract with Pils or 2-row malt to make an all-grain batch!
Blonde Stout Extract Recipe
Stats:
Volume: 5 gallons (18.9L)
Predicted SRM 3.86
Predicted IBU 20.04
Original Gravity 1.044
Final Gravity 1.012
ABV- 4.20%
Steeping Grain:
1.5lb (680.4 grams) Pilsen Malt
1lb (453.6 grams) Flaked Barley
1lb (453.6 grams) Flaked (Rolled) Oats
8oz (226.8 grams) Crystal 15L
0.5oz (14.2 grams) Cherry Smoked Malt
Steeped at 162F (72.2C) for 20 minutes
Extract:
3.3lb (1.5kg) Pilsen Light LME (30 min)
1lb (453.6 grams) Pilsen Light DME (15 min)
Hops:
0.3oz (8.5 grams) Magnum – 60 minutes
1oz (28.3 grams) Fuggles – 15 minutes
Water:
Local Flagstaff, AZ Tap Water
1/4 tsp (0.85 grams) CaCl
1/4 tsp (1 gram) Gypsum
Yeast:
Imperial Yeast ‘Tartan’ A31 – 1 packet
Other Ingredients:
4oz (114.4 grams) Cacao Nibs
2oz (56.7 grams) Coffee Beans (coarsely crushed)
1 Vanilla Bean
These additions should be added either in secondary fermentation or into the keg (in hop bags)
Directions:
Heat 8 quarts (7.6L) of water to 162°F (72.2C). Add brewing salts. Add specialty grain including flaked barley and rolled oats to water. Steep for 20 minutes. Remove steeping grain. Add water to reach 2.5 gallons (9.5L). Boil for 60 minutes, following the hop and extract schedule.
After the boil, chill the wort to slightly below fermentation temperature, about 64°F (17.8C). Top water off to 5 gallons (18.9L). Aerate the wort and pitch the yeast. Ferment at 68°F (20C) for 2 weeks. If bottling, soak cacao nibs, coarsely crushed coffee beans, and shredded vanilla bean in vodka. Add vodka, cacao nibs, coffee beans, and vanilla bean to secondary fermentor in sanitized hop bag. Remove after approximately 3 days. If kegging, this mixture can be added to serving keg instead. Prior to packaging, cold crash the beer to 35°F (1.7C). Bottle or keg the beer and carbonate to approximately 2.25 volumes of CO2.
Tips:
Make it a Stronger Beer!
This recipe was kept to ‘session’ strength. However, the mouthfeel and body that comes along with a stronger beer will complement this style greatly. Simply increase the amount of extract used.
I could see this making a great 8-9% ABV beer.
How to Use Cacao Nibs in Beer
Cacao nibs are my personal favorite way to add chocolate flavor to beer. I find that they tend to add the most natural cocoa/chocolate flavor.
We’ve all likely had chocolate beers that just taste straight up artificial. That is not my goal with my homebrew.
There are two main ways to add cocoa nibs: post-fermentation (ie secondary fermentor or serving keg) OR at the end of the boil.
Adding cacao nibs, or spices in general, is much easier to throw in at the end of the boil. However, you get much less control over the flavor this way. You can also extract more bitterness than intended as well.
My preferred method of adding is post-fermentation. I like to soak the cacao nibs in vodka for at least 24 hours. Then place the cacao nibs in a sanitized hop bag. Finally, I will add both the nibs as well as the vodka to either the secondary fermentor or serving keg.
In this particular recipe, I added them to the serving keg. Both the cacao nibs and the coffee were removed from the serving keg after about 3 days.
Specifically with the coffee, I did not want to add any more darkness to the beer than I had to.
How to Keep the Beer Light in Color
Given that this is a blonde beer, you want to avoid anything that may darker the beer!
A couple of unintended things that could darker the beer are oxygenation and boiling/scorching extract.
Oxygenation can occur at multiple steps in the brewing process. The only time that you want oxygen in your beer/wort is right before fermentation. At this point, the oxygen is necessary for the yeast to replicate. At any point after this, oxygen is to be avoided. During transferring or packaging, oxygenation can occur if not careful. Oxygenation can also occur if there is too much ‘head space’ in your secondary fermentor. This can be avoided by adding sanitized marbles to the bottom of your fermentor.
Boiling extract for too long, and especially scorching the extract can make your beer darker. To avoid scorching, remove your pot from the heat source when adding extract it. Stir as much as you can while adding the extract to ensure that it does not contact the bottom of the pot.
I choose to move extract additions towards the end of the boil (hence the 30 minute addition vs 60 minute addition) when I want a lighter beer.
How to Add Coffee to Beer:
There are three main ways to add coffee to beer:
- Add crushed/coarsely ground beans to the boil
Pros: Balanced coffee flavor and bitterness, easiest method, don’t have to worry about sanitization as beans are added to the boil
Cons: Will make the beer darker, will add bitterness to beer (bad if trying to avoid this)
Comments: Best added in the last 10 minutes of boil or whirlpool, great for porter/stout - Add brewed coffee to the beer (either drip or cold brew)
Pros: Will add more coffee flavor without the associated bitterness (especially cold brew)
Cons: tastes less ‘natural’, in my humble opinion, will add a slight amount of color to beer (less than method #1)
Comments: Adding cold brew is recommended over drip coffee - Add crushed beans to the fermentor
Pros: Adds good coffee flavor without affecting color very much
Cons: Biggest worry regarding sanitization as beans are added after/during fermentation
Comments: Best suited for blonde stouts, coffee Kolsch, or other light beers. Can extract a good amount of flavor in just 2-3 days in the fermentor/keg.
For this particular beer, I went with the third method as it contributes the least amount of darkness to the beer.
Thank you very much for stopping by!
If you, too, are a coffee lover like me, you may want to check out this coffee porter recipe!
Follow my links here if you would like a step-by-step walk through of how to brew in the extract style or brew in a bag style.
I am active on Facebook and Instagram, so please feel free to ask me any questions on there!