The New England IPA, also known as NEIPA or Hazy IPA, may just be the most popular beer style of recent years. For good reason, I would argue! NEIPAs offer a delicious alternative to the formerly more popular very bitter IPAs. The New England IPA features a soft mouthfeel with juicy, dank, and delectable aroma and flavor. In this article, I’ll show you my hazy New England IPA BIAB Recipe!
What is a New England IPA?
According to the BJCP (Beer Judge Certification Program): A New England IPA (NEIPA) is “an American IPA with intense fruit flavors and aromas, a soft body, and smooth mouthfeel, and often opaque with substantial haze. Less perceived bitterness than traditional IPAs but always massively hop forward. This emphasis on late hopping, especially dry hopping, with hops with tropical fruit qualities lends the specific ‘juicy’ character for which this style is known.”
The style guideline is currently 21B for those that will be brewing for competition or would just like to learn more from the BJCP!
This style is a nice alternative to the popular West Coast style American IPA. Prior to NEIPAs becoming popular, the trend with IPAs seemed to be loading them up with as many bittering hops as you could. Sometimes these beers would almost verge on undrinkable as they were just frankly so bitter!
As the BJCP definition states, a big difference with NEIPAs vs West Coast IPAs is making later hop additions. Instead of lots of early-boil bittering additions, the focus is on very late-boil or dry hop additions. This extracts less alpha acids, and gives you more of the aromatic qualities from the hops.
One of my favorite books about NEIPAs and IPAs of today is The New IPA: Scientific Guide to Hop Aroma and Flavor. Check it out!
How to Brew a Good New England IPA
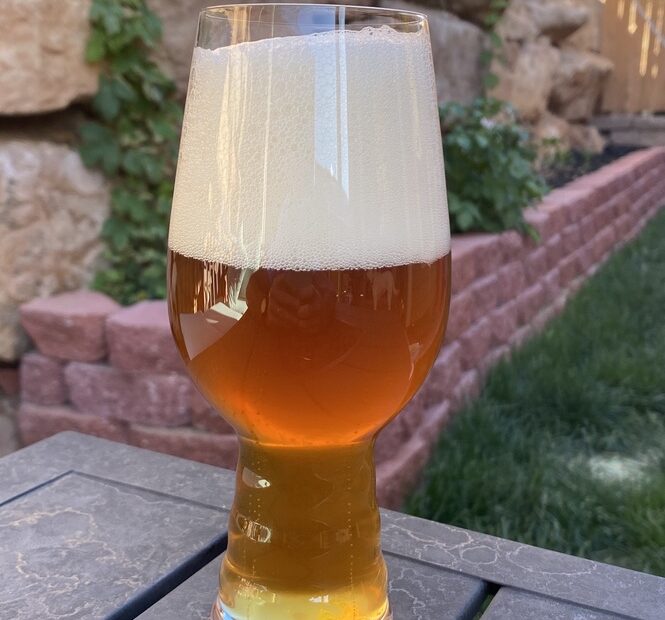
The goal for a good NEIPA should be hazy appearance, lots of fruity aromas and flavors, with a soft mouthfeel.
When looking at grain, flaked wheat and rolled oats will help you to achieve this soft and almost creamy mouthfeel. These grains will be added along with your other malt in the mash.
There is very little fermentable sugar that you will get from the oats, but they will add the mouthfeel you’re desiring in a NEIPA. Another benefit is that while these grains are mashing, it’ll smell like a delicious oatmeal breakfast.
A water profile with high amounts of Calcium Chloride can also help to provide a super soft mouthfeel.
Hop choice and hop schedule make a huge difference between an okay NEIPA and an amazing one.
There are currently more fruity hop choices than ever before, so it can get overwhelming with choices. The hop combination in the recipe below shoots for strong fruit presence along with some ‘dank’ aromas coming from the Simcoe hop.
However, hop choice is one of the most fun parts of brewing, so feel free to get very creative with this!
You will likely still want a small bittering addition, but as noted earlier, the focus should be on late additions and dry hopping!
How to Dry Hop
Dry hopping is the act of adding hops to the wort/beer in the fermentor.
Hops can be added in the primary fermentor or secondary fermentor.
You will want to wait until active fermentation has slowed down. The reason for this is many of the hop aromatics that you are desiring in your finished beer can be ‘blown-off’ by the CO2 leaving the beer.
Hops can be added loose or contained in a hop bag. You will get slightly more contact with the beer if hops are added loose, but it will be harder to clean up.
I generally add the hops in a hop bag due to ease of clean-up, and I haven’t noticed a significant difference in flavor/aromas produced.
There is usually no reason to let hops sit in the beer for longer than 5-7 days as most of the flavors and aromatics have been extracted by that time.
Stats:
Volume: 1.5 gallons (5.7L)
Predicted SRM 7.24
Predicted IBU 40.67
Original Gravity 1.070
Final Gravity 1.015
ABV- 7.22%
Steeping Grain:
2lb (907.2 grams) American 2-row
2lb (907.2 grams) Golden Promise
8oz (226.8 grams) Flaked Wheat
8oz (226.8 grams) Flaked (Rolled) Oats
2oz (56.7 grams) Honey Malt
Mash at 154F (67.8C) for 60 minutes, Strike Water Heated to 166F (74.4C)
Hops:
0.1oz (2.8 grams) Mosaic – 30 minutes
0.2oz (5.7 grams) Simcoe- 10 minutes
0.3oz (8.5 grams) Amarillo- Whirlpool
0.3oz (8.5 grams) Mosaic- Whirlpool
0.3oz (8.5 grams) Citra- Whirlpool
0.2oz (5.7 grams) Simcoe- Whirlpool
0.3oz (8.5 grams) Amarillo- Dry Hop Day 4
0.3oz (8.5 grams) Citra- Dry Hop Day 4
0.3oz (8.5 grams) Mosaic- Dry Hop Day 4
0.3oz (8.5 grams) Simcoe- Dry Hop Day 4
Water:
Local Flagstaff, AZ Tap Water
1/4 tsp (0.85 grams) CaCl
1/16 tsp (0.25 grams) Gypsum
0.5mL Lactic Acid
Mash at 1.75qt/lb= 9 quarts (8.5L)
Yeast:
Imperial Yeast ‘Dry Hop’ A24 – 1 packet
Directions:
Heat 9 quarts (8.5L) of strike water to 166°F (74.4C). Add brewing salts. Mill the grains (don’t mill wheat and rolled oats) and mix with strike water to reach a mash temperature of 154°F (67.8C). Hold mash temperature for 60 minutes. Sparge the grains with 170°F (76.7C) water until you reach a volume of 2.5 gallons (9.5L) of wort. Boil for 60 minutes, following the hop schedule.
After the boil, chill the wort to slightly below fermentation temperature, about 64°F (17.8C). Aerate the wort and pitch the yeast. Ferment at 68°F (20C). Dry hop on day 4. Ferment for total of 2 weeks, then cold crash the beer to 35°F (1.7C). Bottle or keg the beer and carbonate to approximately 2.25 volumes of CO2.
Tips:
Make it a Milkshake IPA!
Milkshake IPAs are super popular. You could easily give this even more of that soft, creamy mouthfeel associated with the milkshake IPA by adding lactose to this recipe!
I would recommend adding the lactose with 5-10 minutes left in your boil.
Lactose is a non-fermentable sugar. This means that your yeast will not be able to consume it to produce alcohol, thus, it will leave resulting thicker mouthfeel.
Beer Color (SRM)
If you want a lighter color beer, you can increase the ratio of 2-row to Golden Promise. Golden Promise will give you a sweeter and slightly fuller mouthfeel than 2-row will, but it will make your beer darker as it has a slightly higher lovibond.
Golden Promise is generally a tad more expensive than American 2-row.
The Honey Malt used in this recipe did contribute to its darker color as well.
Why Add Lactic Acid?
Lactic acid is a very easy way to quickly adjust your pH. pH is important in the mash step of your BIAB process. Having a correct pH will make a significant difference in your ‘efficiency’.
Efficiency is essentially the amount of sugar that you’re able to extract from the grain.
Lactic acid will decrease the pH of your mash. The ideal mash pH of lighter beers will be lower than darker beers, ranging from pHs of about 5.0-5.6.
Thank you for stopping by!
I love the brew in a bag method! If you would like to learn more about brewing in a bag, please click here!
Maybe extract brewing is more your style, I do have a similar extract recipe for a NEIPA here!
If you would like to see more small batch recipes, please follow this link.