I had the pleasure of being able to try out LaMotte’s BrewLab Basic water testing kit recently. As this was something I knew my readers would be interested in, I wanted to write a detailed review on the product. My goal of this article is to discuss why testing your water is important and to help you select the right method of testing for your particular application. Here is my LaMotte BrewLab Basic Test kit review!
This post is sponsored, but all the thoughts and ideas contained within it are my own.
Do I Need To Test My Brewing Water?
Let’s start out with answering the big question leading to why kits like this exist: do I need to test my brewing water?
Water is the ingredient that makes up the largest component of your finished beer. We spend hours choosing the perfect percentage of each malt in the grain bill and picking the type of hops with just the right alpha acids and aromas, but often water chemistry gets overlooked.
Water chemistry can be intimidating. It is especially intimidating when you only have a vague idea of the content of your tap water. This is especially difficult when the sources of your water change several times a year as was the case in my last hometown (more on this later).
To answer this question, I would argue that if you are strictly brewing using extracts, it is not necessary to test your water chemistry. However, for BIAB (brew-in-a-bag) or all-grain brewing, testing your water will help you increase the quality of your beer significantly.
Why Do I Need to Test My Brewing Water?
- The mineral/salt content of your brewing water can and will affect taste.
As mentioned above, ingredient-wise, water is the largest component of your finished beer. It is often said, if your water tastes good enough to drink, it is good enough to brew with. I would agree with this statement to an extent. We all have different thresholds for acceptable tasting water. If you are fairly tolerant to less than superb tasting water, your friends/family that are a bit pickier with their taste in water may not enjoy your beer quite as much.
2. Brewing salt content affects your efficiency.
Another point here is that in BIAB or all-grain brewing, water chemistry can make a significant difference in the efficiency of your mash. In the brewing world, efficiency is defined as the percentage of the available complex carbohydrates found within the grain that are broken down into simple sugars that the yeast can metabolize during fermentation. A mash efficiency greater than 70% is considered good.
Most brewers would agree that calcium is the most important brewing salt when it comes to good mash efficiency, among other roles within the brewing process. Calcium plays a large role in manipulating the pH of the mash. Getting the correct mash pH is a very easy way to significantly increase your mash efficiency.
3. Water chemistry significantly affects mouthfeel.
Brewing salts also play a large role in the taste and mouthfeel of a finished beer. An example that many experienced craft beer drinkers would be familiar with is the difference between a New England IPA and a West Coast IPA. The hazy New England IPA should have a soft, smooth, creamy mouthfeel with juicy hop notes. On the other hand, your West Coast IPA will have a very crisp hop bitterness with a drier finish. Timing of hops and grain bills do differ between these styles, but a large difference in the recipe is the water chemistry between the two. NEIPAs generally use a higher calcium to sulfate content to get the smooth and creamy mouthfeel. West Coast IPAs are the opposite, sulfate is used in higher amounts as this gives the biting hop bitterness you expect.
Now you could simply add more calcium or sulfate to your tap water and hope for the best. However, this is, at best, an educated guess.
If you desire to create the absolute best homebrew you can make, knowing your baseline water chemistry is essential!
How Can I Test My Water for Homebrewing?
There are two main methods to test your homebrewing water. The first being sending a sample of your water to a lab. Second is purchasing a kit to test your water at home.
I’d like to give my thoughts on each of these methods and why I went the direction that I did.
Sending Brewing Water to a Lab
Pros: Generally less expensive, less time consuming on your part
Cons: Have to wait for results, if you’re worried about a change in water chemistry- you have to send in another sample
Reasons to send water to a lab:
If you value your time over anything else (would be surprising for a homebrewer, but you never know!), I would recommend lab testing. Each sample of water with a testing kit takes about 30 minutes of your time. This is likely more time than it would take you to collect a water sample and send it off to a lab.
If you only intend to test one sample of water, it would be more cost efficient to use lab analysis.
Using a Home Testing Kit
Pros: Immediate results, can test multiple samples of water with kit, more cost effective if testing multiple samples of water, feels like chemistry class again but more fun
Cons: Generally more expensive initial cost, time consuming on your part
Reasons to purchase a home testing kit:
If your brewing water changes sources seasonally, I would recommend retesting your water with the change in seasons. This was the case for me while living in Flagstaff, AZ. There were right around 6-7 sources of water that contributed to our tap water at any given time. These would change season-to-season. It is unsafe to assume that the water chemistry results you got in December are the same as June.
If you intend to test several samples, a home testing kit would be a more economical choice. Whether you are dialing in your water softener (as I intend to do) or you want to be able to share the kit with friends, using a home kit makes sense if you plan on testing multiple samples.
If you are impatient or simply want to have your results as quickly as possible, a home test kit is the way to go. The waiting time for transportation of water samples as well as testing can be frustrating when using a lab.
If you enjoy the science of brewing, I would highly recommend purchasing a home testing kit. It feels like you are back in chemistry class but without any of the stress!
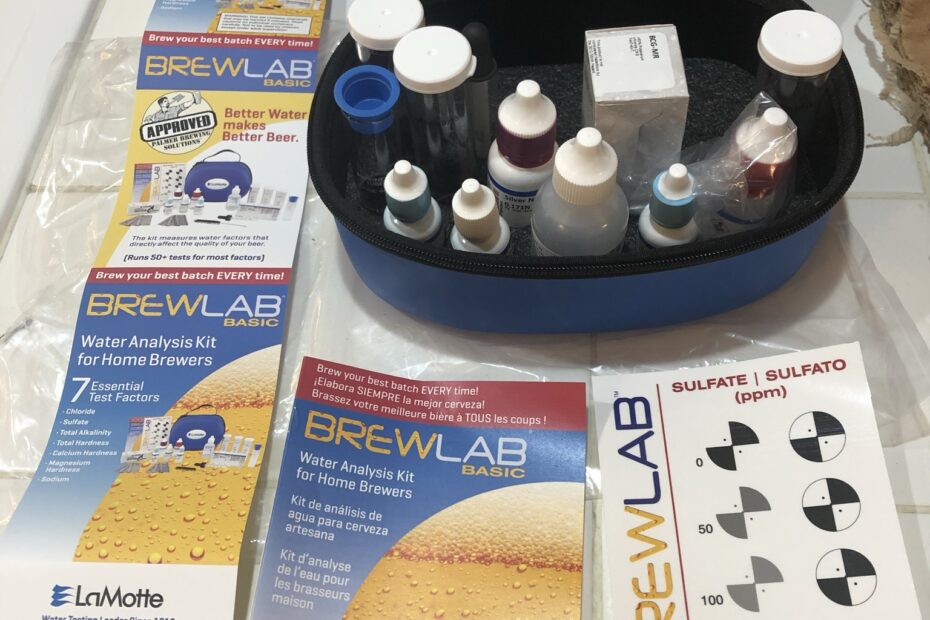
LaMotte BrewLab Basic Testing Kit Review
I had the pleasure of trying out the BrewLab Basic testing kit from LaMotte. This is one of three kits that LaMotte produces for brewing. LaMotte also makes the BrewLab Plus kit, which includes everything the basic kit does along with a pH meter. The BrewLab Pro is LaMotte’s top of the line kit designed with the professional brewer in mind. This tests everything that the BrewLab Plus kit does as well as temperature, dissolved oxygen, and dissolved solids.
I have the luxury of writing this review right after using this kit for the second time. I tested both my in-home, softened water and my outside non-softened irrigation water.
What Is Tested with the BrewLab Basic Kit?
There are seven factors that are tested for in your brewing water with this kit. These factors include: chloride, sulfate, alkalinity, total hardness, calcium hardness, magnesium hardness, and sodium.
Five of these factors are tested for directly and two are tested for using calculations from the results you obtain while testing your water.
Difference Between BrewLab Basic and BrewLab Plus
The difference between these two kits is the addition of a pH meter with the BrewLab Plus kit. I found the BrewLab Basic kit had everything that I needed to test my homebrewing water. I would argue that most homebrewers that have gotten to the point of testing their brewing water already own a pH meter. If not, I would highly recommend getting one! My advice on which kit to get would simply be, if you already have a pH meter, grab a BrewLab Basic, if not, get the Plus!
Ease of Use
The BrewLab Basic Testing kit is very straightforward to use. The kit comes with a detailed and easy-to-follow instruction booklet in English, Spanish, and French. There are pictures provided throughout the instruction booklet which aid in its use as well.
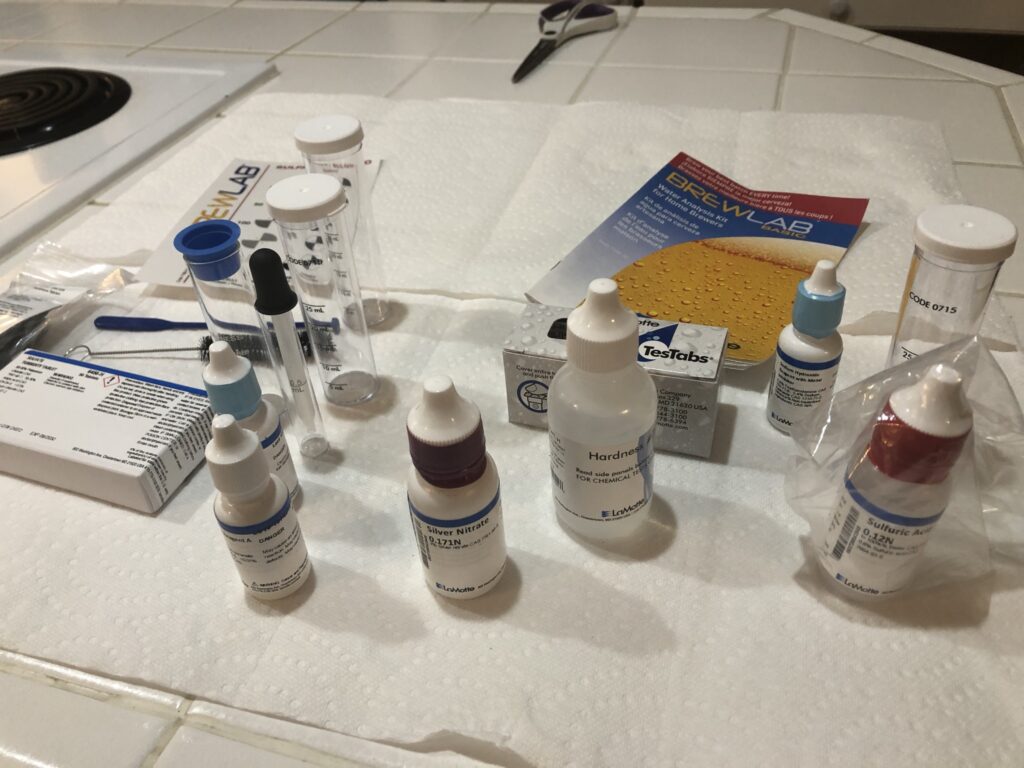
The testing reagents and testing equipment is organized well and well-labeled. There is no question as to if you are using the correct reagent or not. The kit comes with everything you need to perform a high quality water test.
Running through the tests for all seven factors took me just about 30 minutes on each occasion without rushing.
Quality of Product
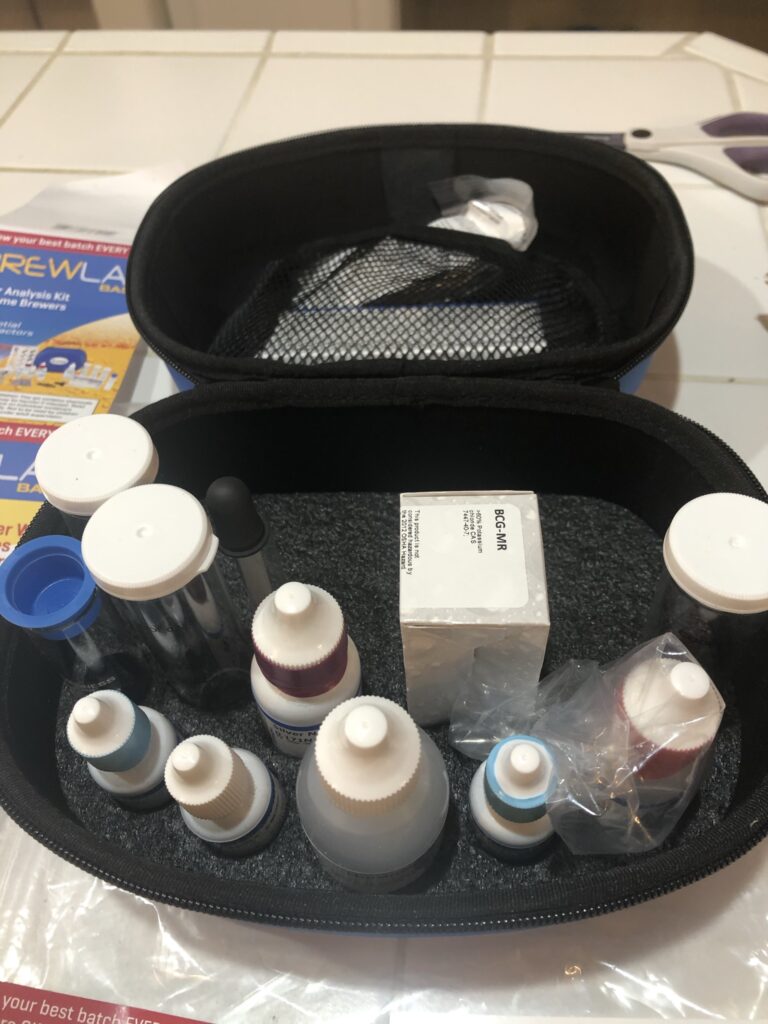
From the test tubes to the carrying kit itself, the quality of the BrewLab Basic kit feels superb. As pictured below, each tube and reagent has a specific place in the carrying case. This makes the kit extremely portable without worry about damaging any of the products inside. I found this nice as I would like to be able to test other brewers’ water in the future.
How Many Samples of Water Can You Test?
I would argue that this is mainly dependent on how hard your water is. Many of the tests involve a simple titration in which you are adding a liquid reagent to your water until you notice a color change. In general, the harder your water, the more drops your sample will take to change color. For moderately hard water, I would say this kit would test at least 10-20 samples of water. However, I would not be surprised if people were able to test even more with this kit.
Things That I Would Improve On
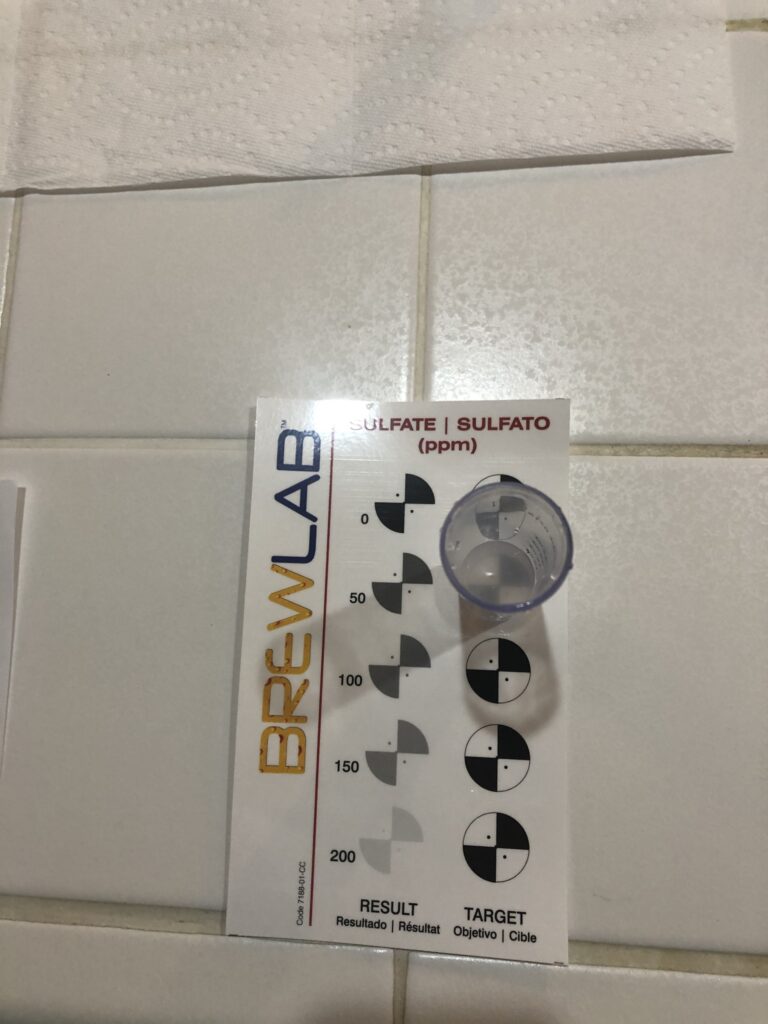
The test that I had the hardest time with was the test for sulfate. As mentioned above, most of the tests involve a simple titration where you are adding drops of a reagent until you notice a clear change in color. This type of test leaves very little room for user error.
The test for sulfate is a turbidity test in which you are to look through your water and compare your result to different shades of gray on the left. I will provide a picture below so this makes more sense. I found more room for user error with this method, but with a second opinion, I was still able to have fairly good confidence in my ultimate result.
Review Summary
Overall, I would highly recommend the LaMotte BrewLab Basic testing kit to any homebrewer looking to take that next step into determining right where their current water chemistry is at. You can tell that a lot of thought was put into producing this kit and making sure that it is very easy to use.
I like that I can test my water again quickly if I suspect any change in water chemistry. This is especially helpful if you live in a region where your water chemistry changes seasonally. Also, as one of the greatest joys of homebrewing is sharing, I fully plan on testing other brewers’ water with this kit. This is a luxury that is not provided by the send-in type of testing as discussed above.
That said, I do plan on sending in both my indoor and outdoor water samples into a lab for testing to see how close the results are. I don’t think that either the lab results or home test kit results can be considered a ‘gold standard’, but I would find it interesting to see how these compare.
This kit helped me to realize that the water at my new residence is not currently suitable for brewing. This knowledge will be greatly beneficial to ensure I continue to produce quality beer!
This site is dedicated to making brewing as easy and fun as can be. If you are interested in how-to articles ranging from extract brewing to kegging, please click here! If you’d like to check out some recipes for inspiration, follow this link!